How to Knit the Stamen Stitch
knitting tutorial

Learn how to knit the Stamen Stitch in this step by step written tutorial with video included! This is an easy stitch and great even for beginner knitters. Skip ahead to the video [here].

It's no secret that I love the Stamen Stitch, so naturally I needed to bring y'all a tutorial for it! :) The Stamen Stitch is worked in a 4 row repeat. You will cast on your STS in multiples of 2 and then repeat these 4 rows until you reach your desired project length. I actually have a blanket pattern coming out very soon using this knitting stitch, so stay tuned for that! Let's get started!
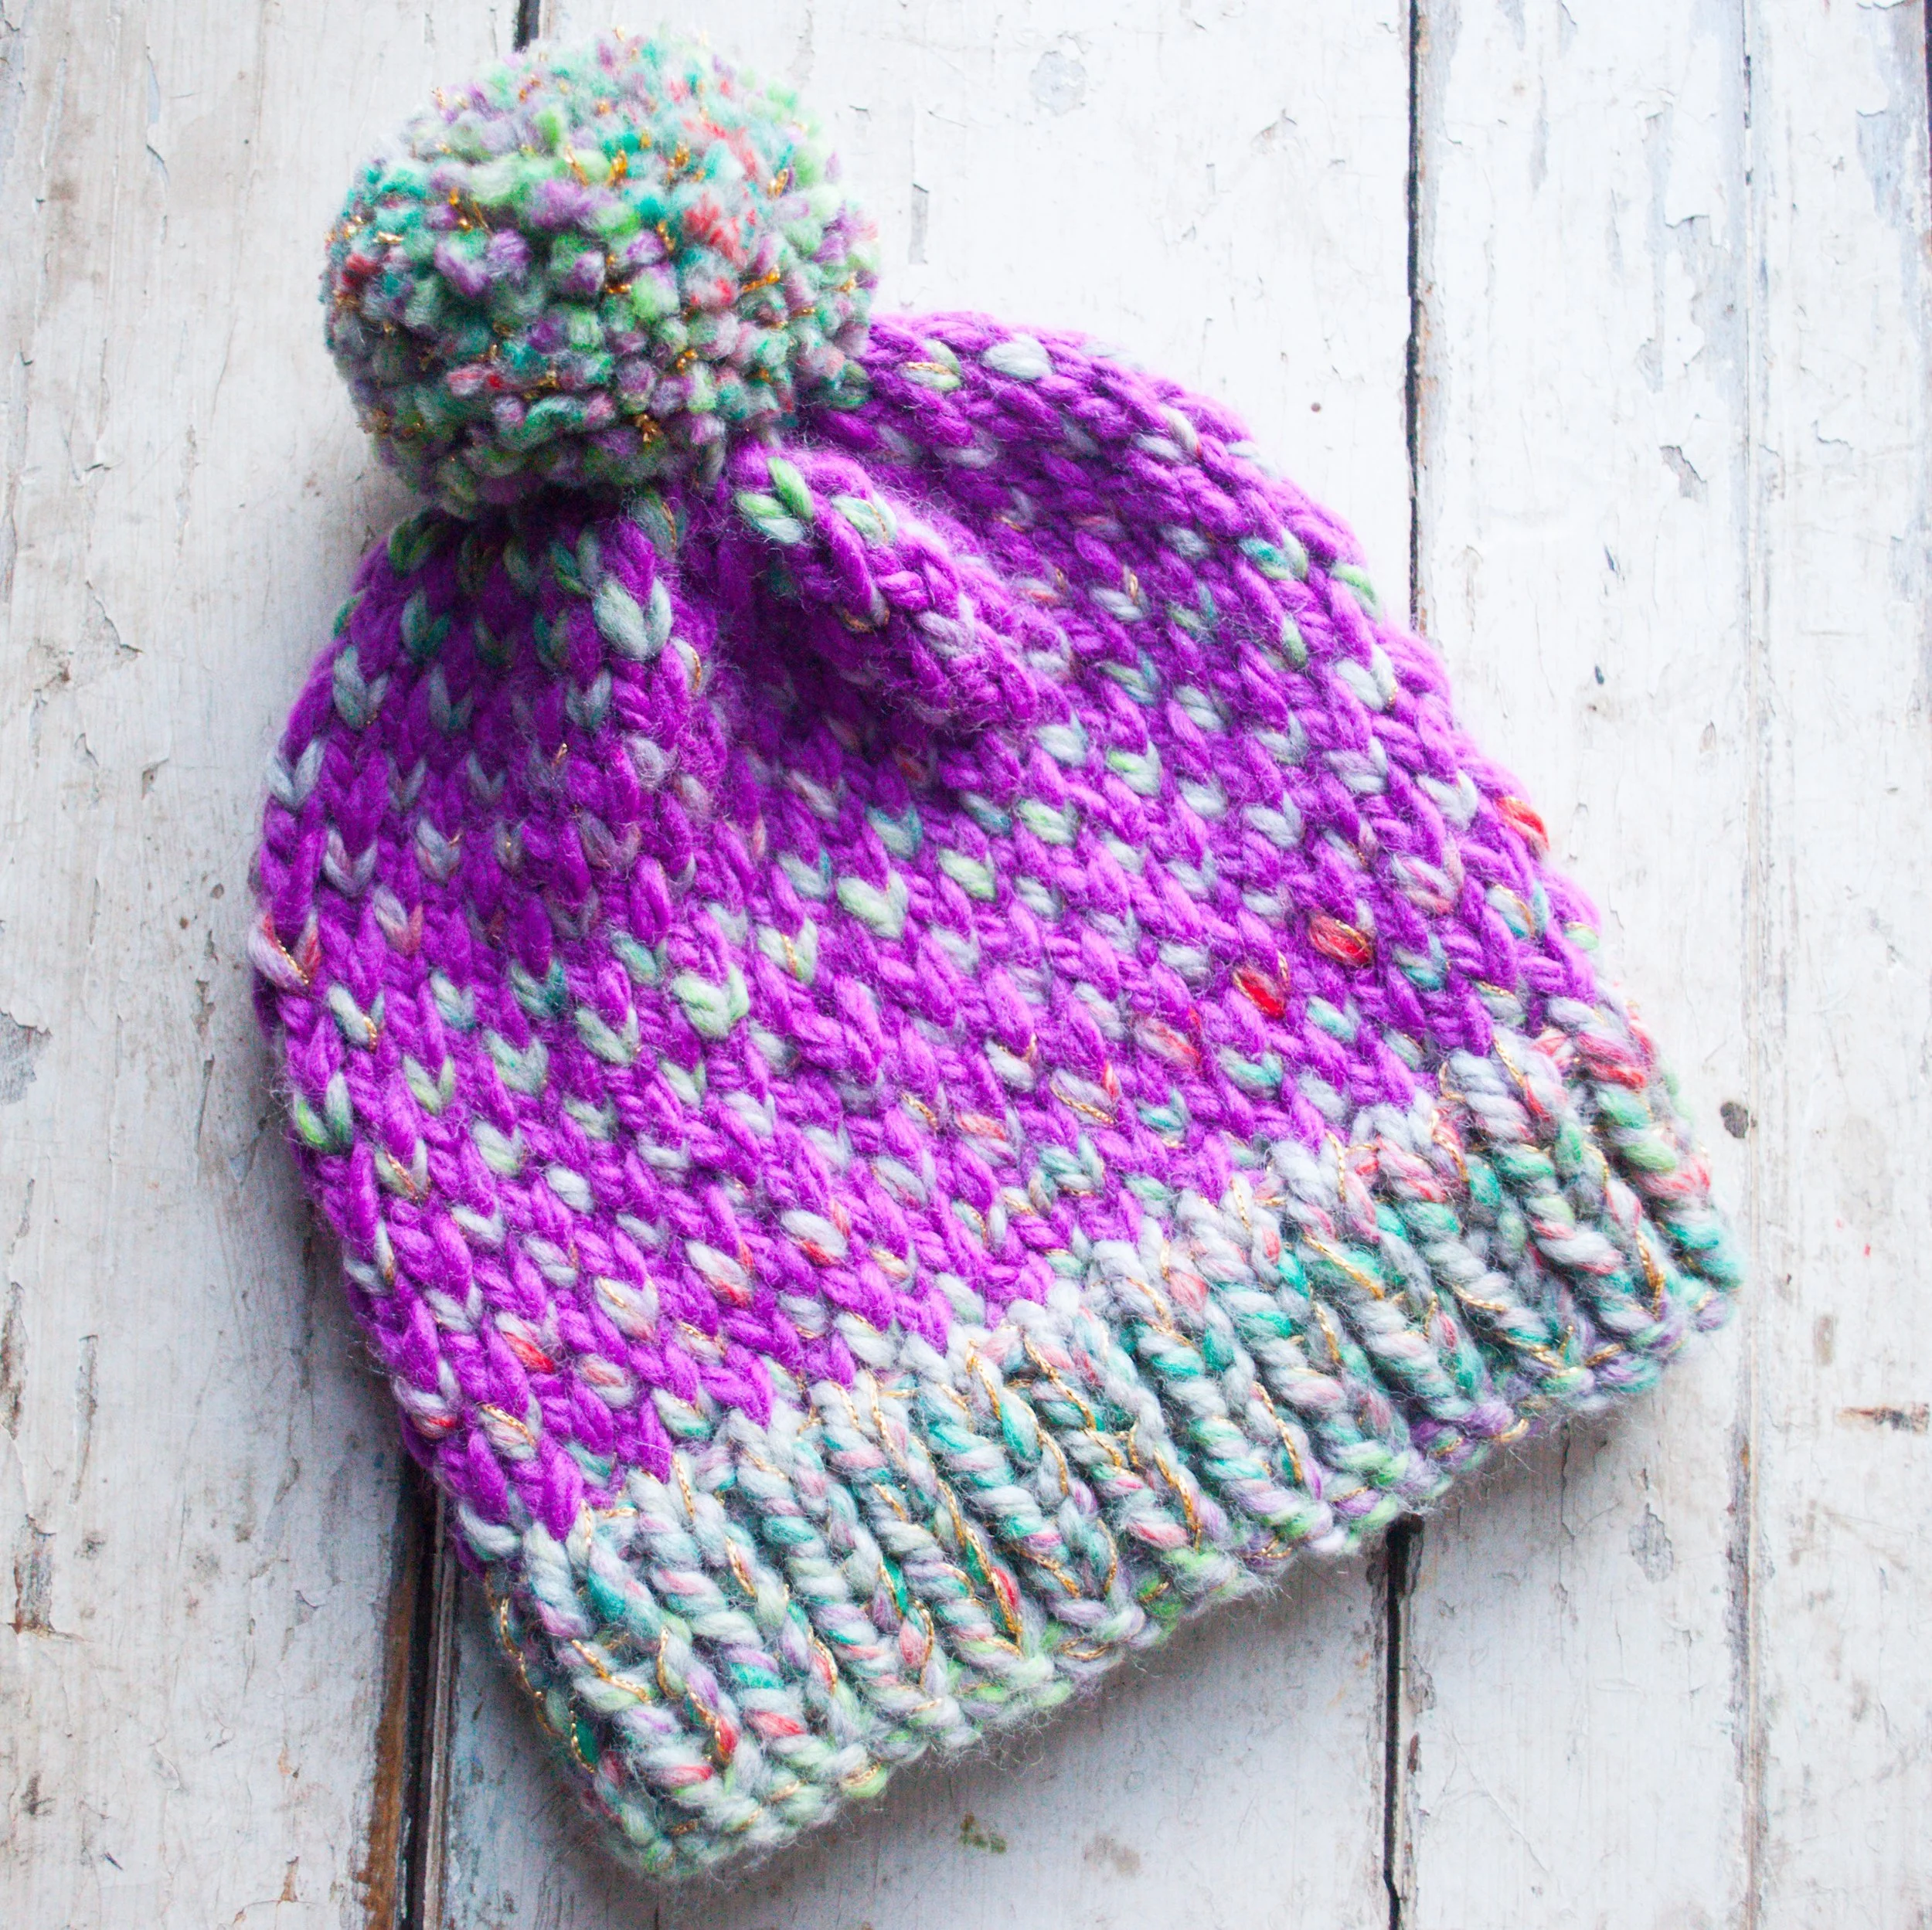
The Stamen Stitch is a really cool stitch that gives great texture and unique visual interest! I first used this stitch when I designed my Cloud Catcher Beanie pattern. It gave the brim of this beanie such a fun and textured look....the amazing Knit Collage yarn didn't hurt either. ;) You can find the free knitting pattern for that beanie [here]. Next, I used this stitch in my Unicorn Sparkle Beanie pattern. As you can see, when worked in the round it looks completely different...but still so pretty! I have a free pattern for that beanie as well [here]!
enjoy videos more?
If videos are more your jam, here is a step by step video on how to knit the stamen stitch. Press play!
step by step stamen stitch tutorial
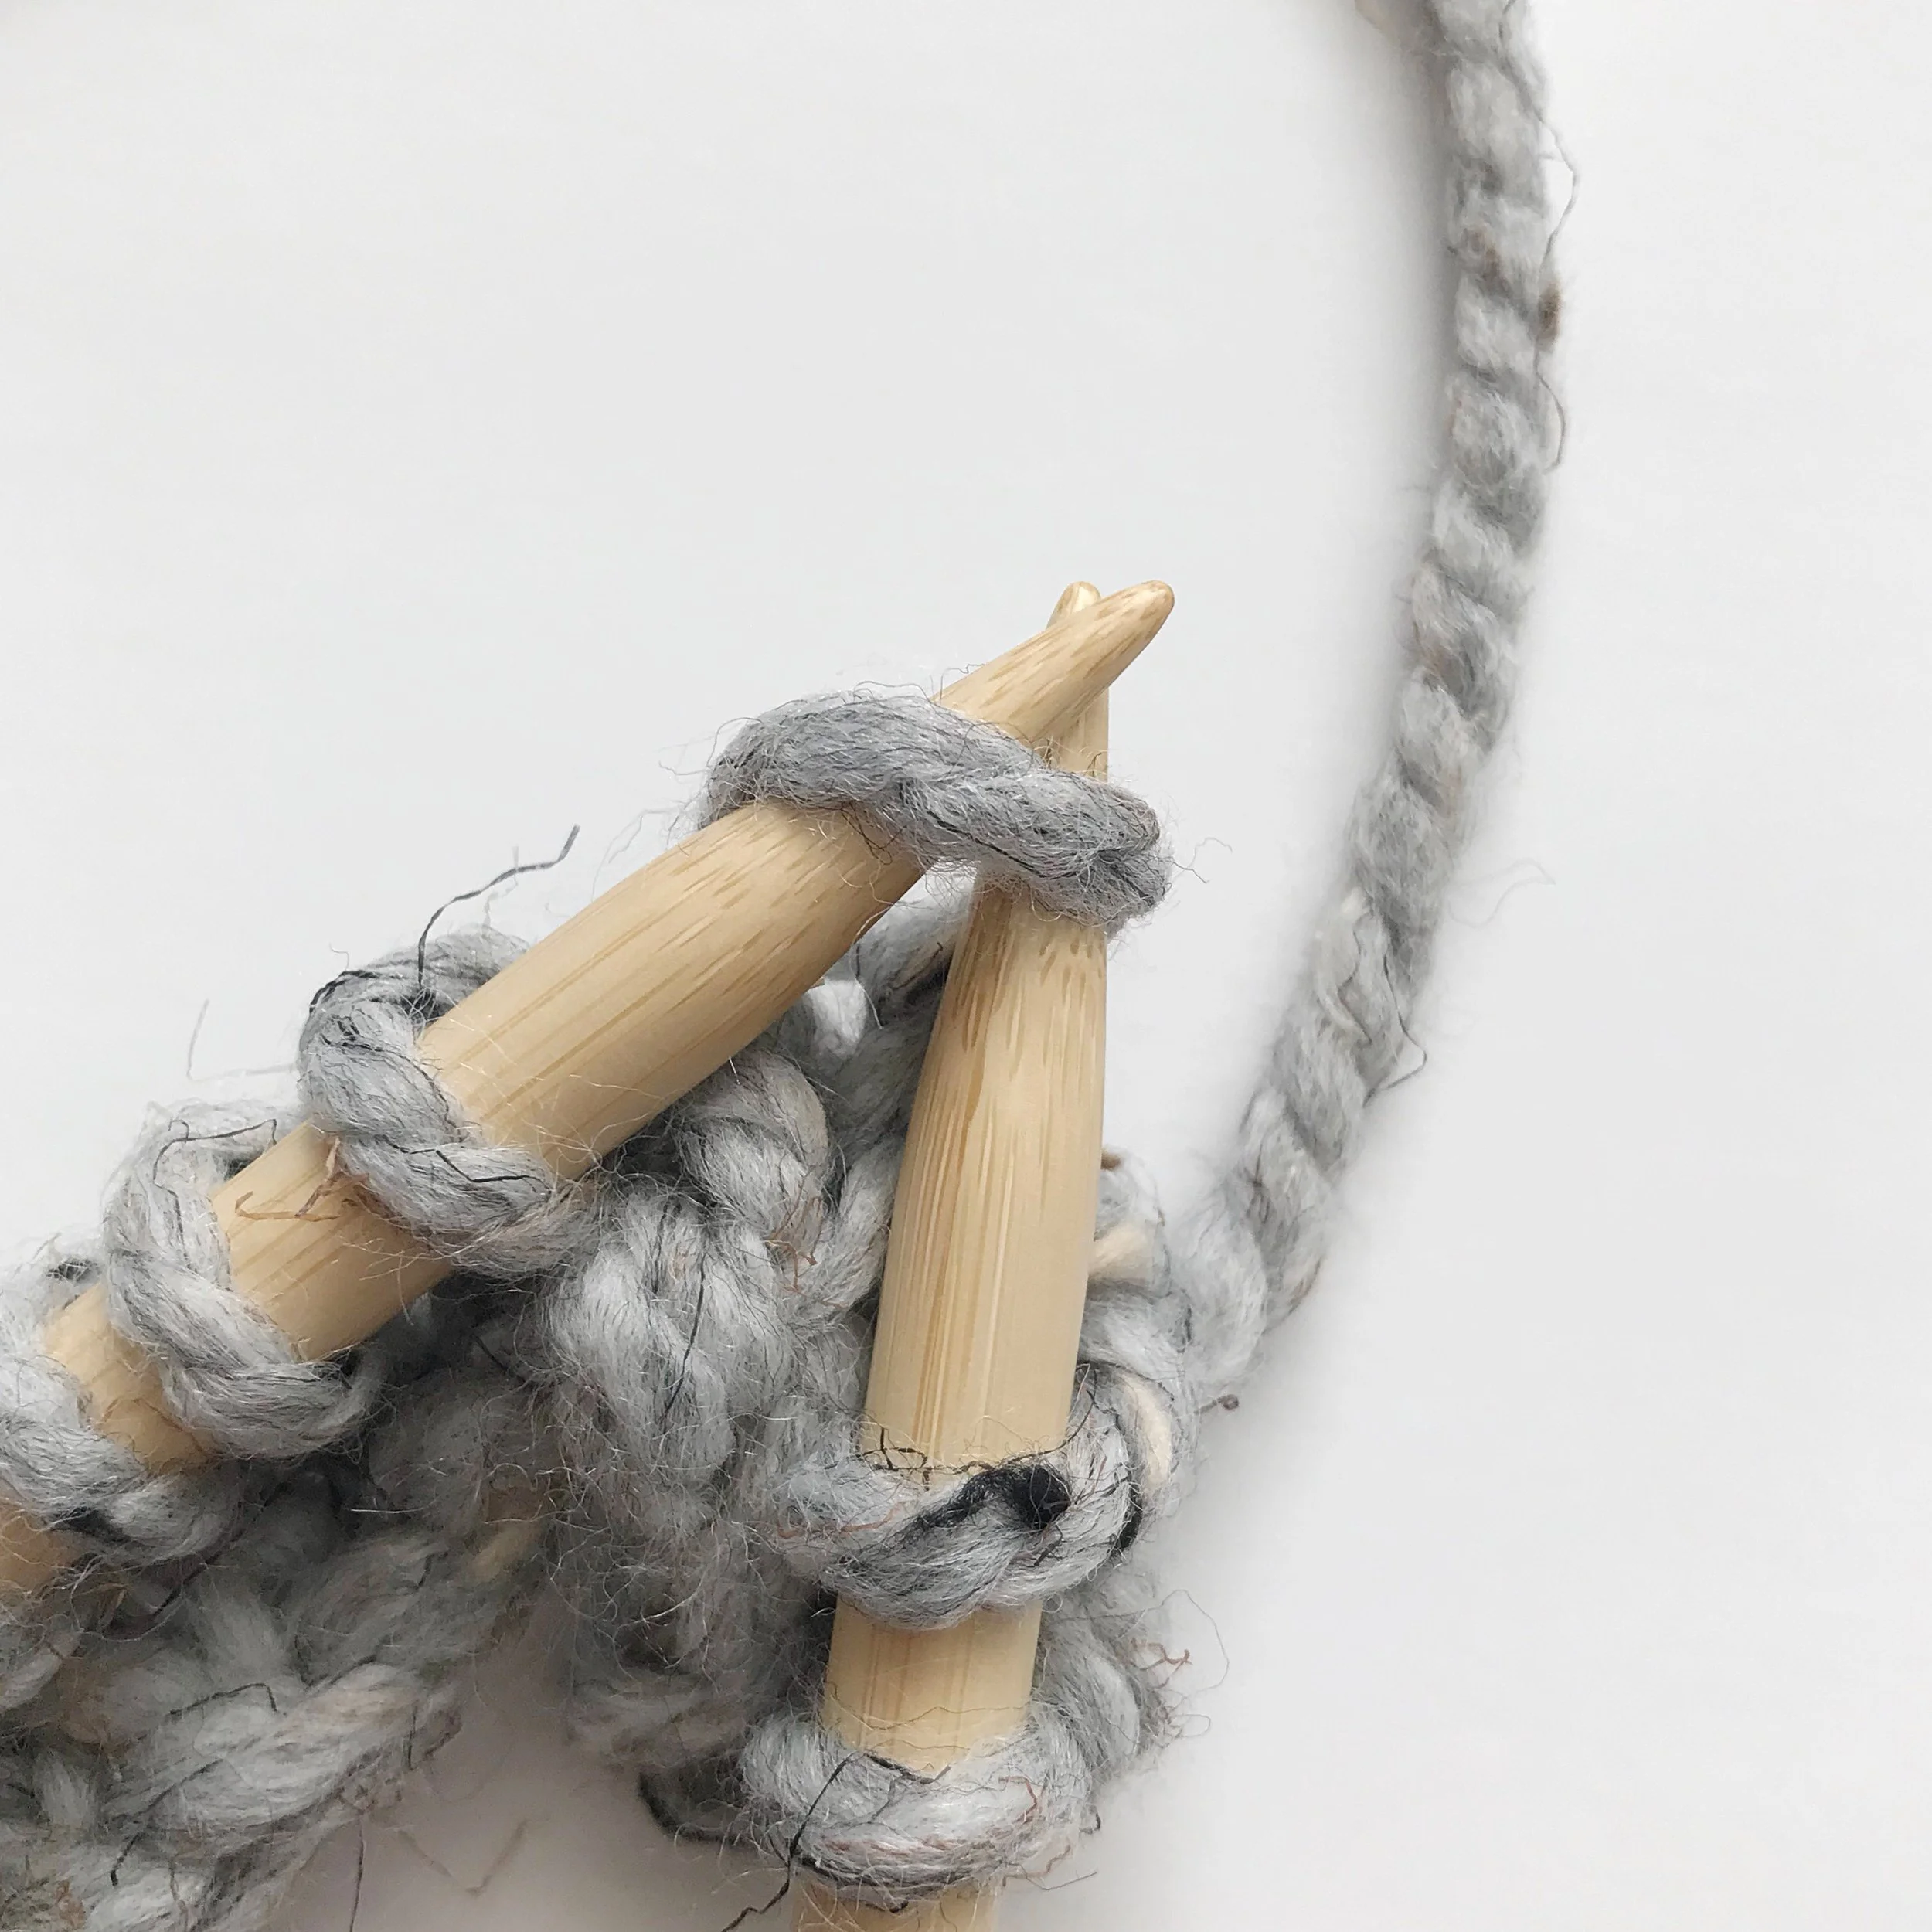
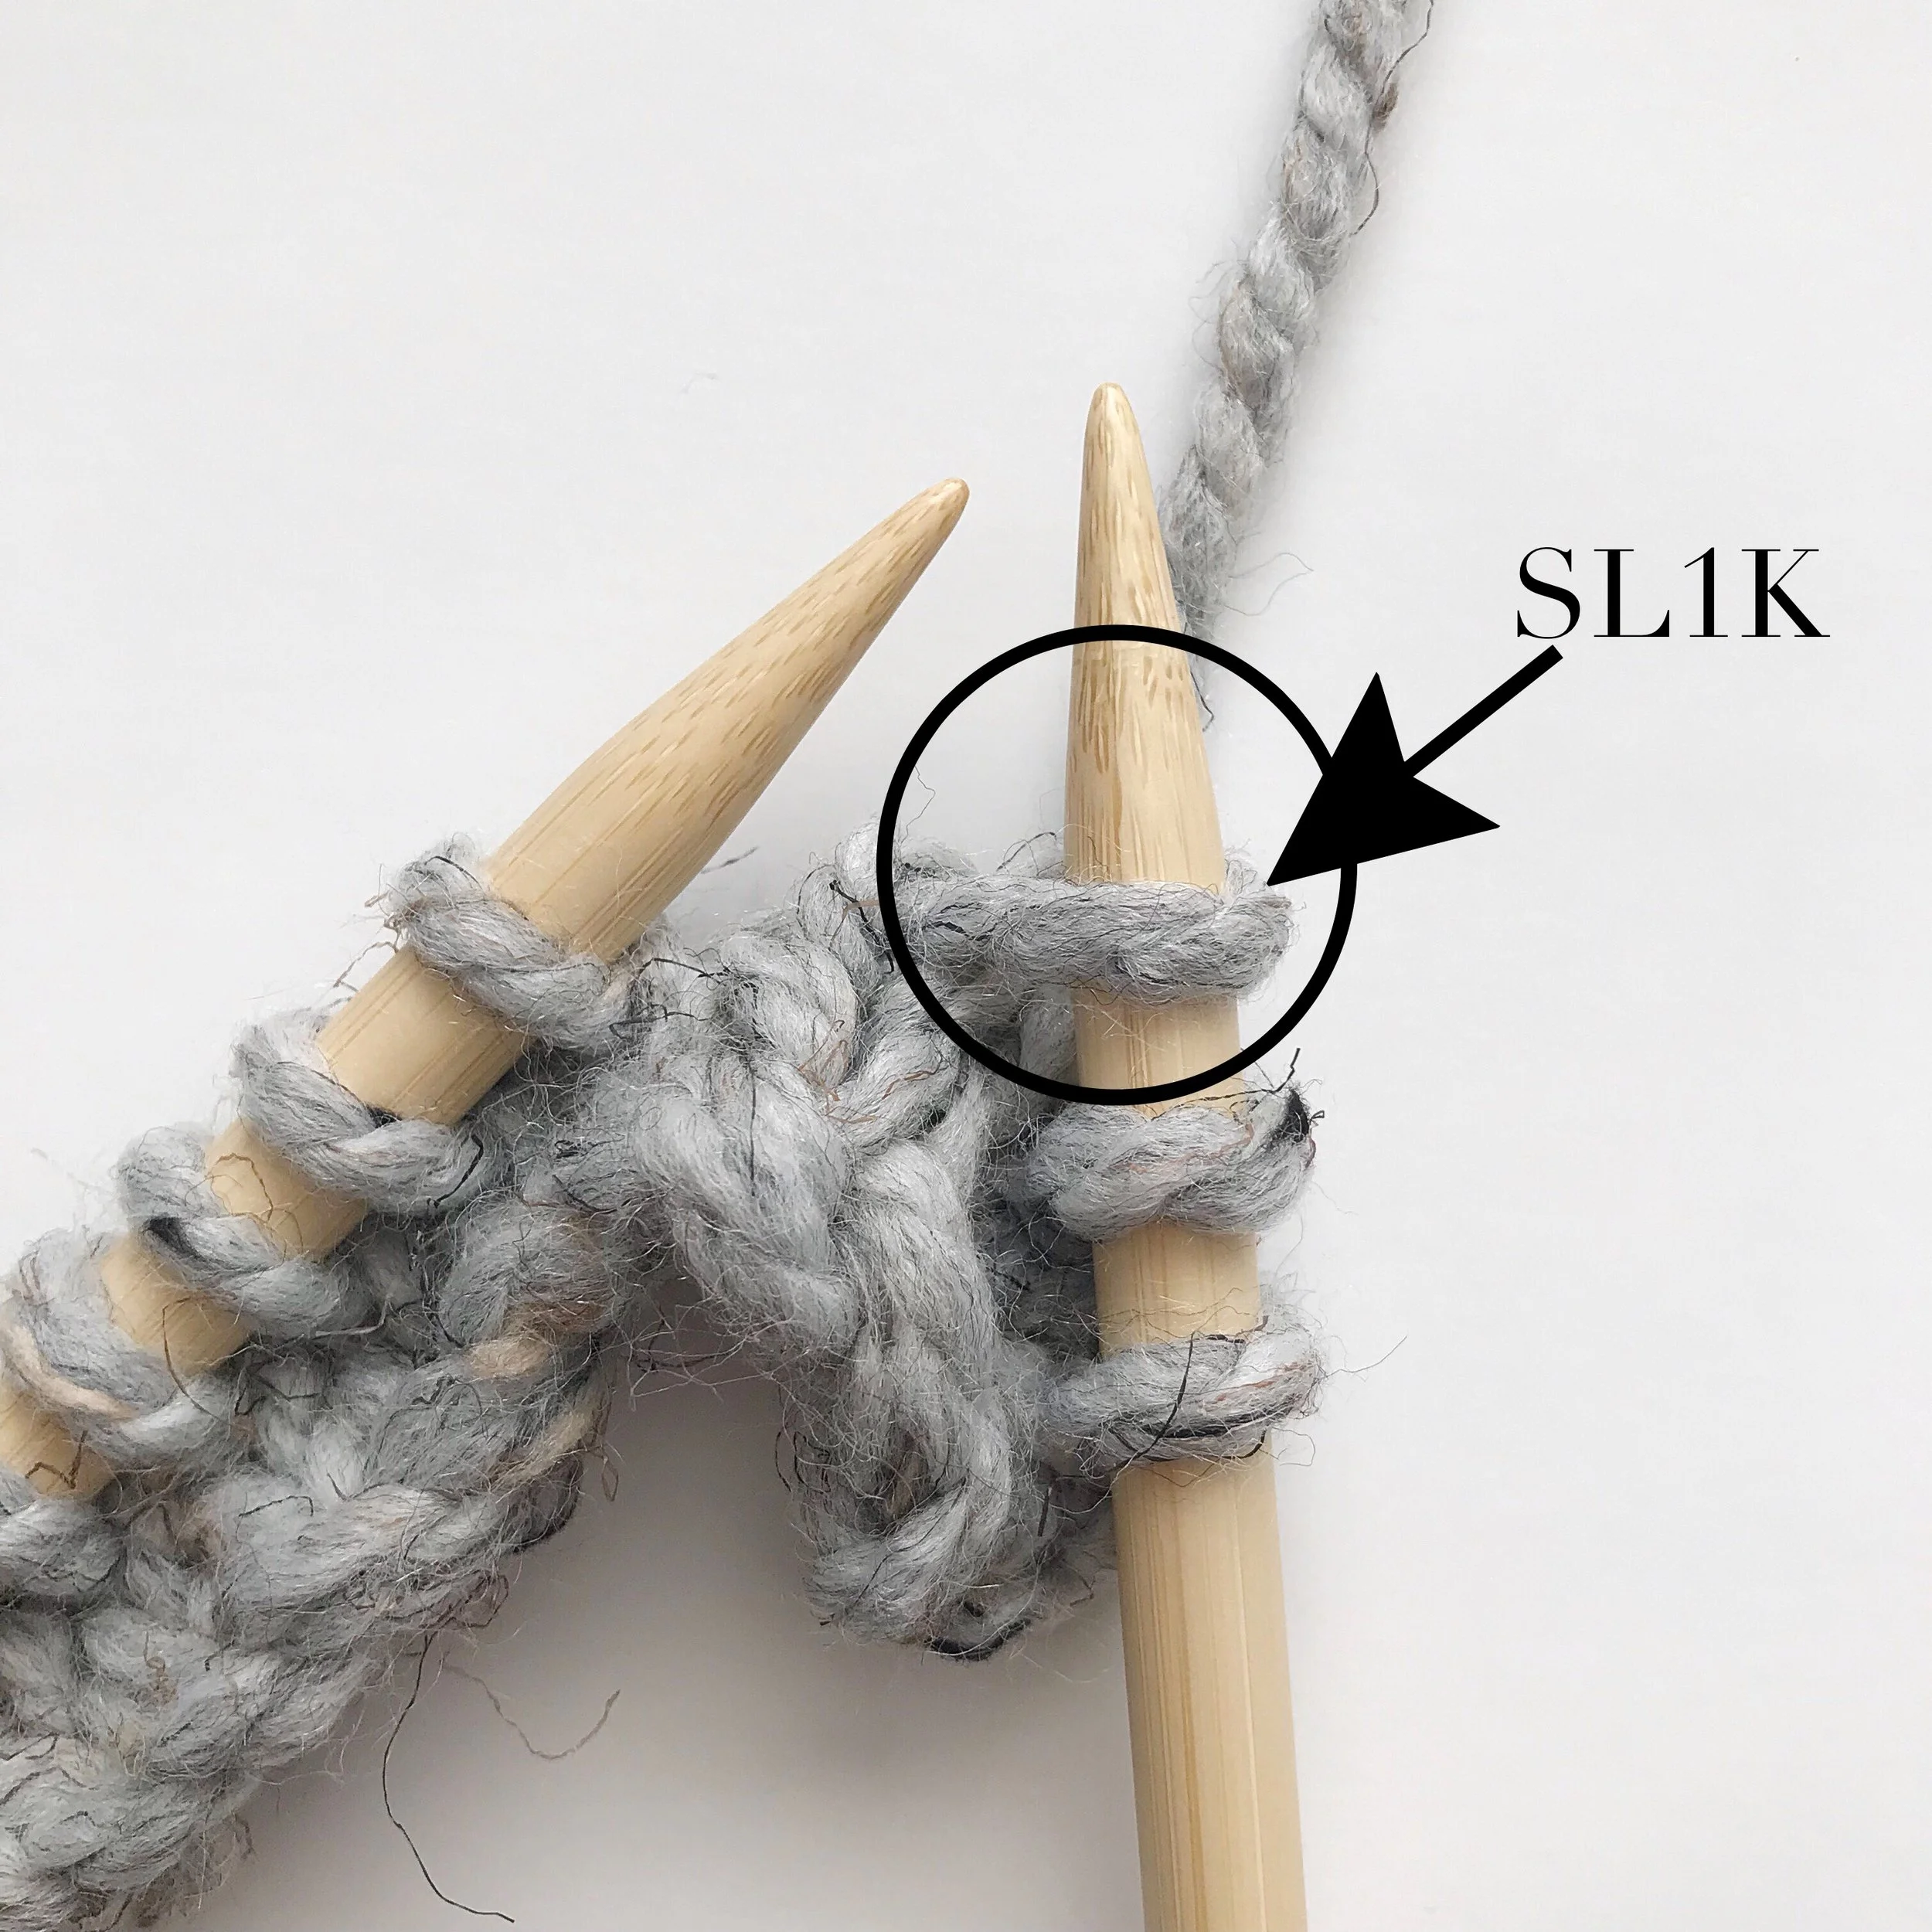
Note: if you have never done a SL1K before, no worries! Find the photo tutorial below, or I cover it in the video tutorial as well.
SL1K (slip 1 knitwise) – insert needle knitwise as if you were about to knit a stitch (see photo #1 below) slip that stitch onto right needle without yarning over to knit. (see photo #2 below)
abbreviations:
CO - cast on
K - knit
SL1K - slip 1 knitwise
ST/S - stitch/es
REP - repeat
stamen stitch 4 row repeat
CO STS in multiples of 2
K.
*K1, SL1K; REP from * to last 2 STS, K2.
K.
K2; *SL1K, K1; REP from * to end.
Continue working this repeat until you reach your desired project length.