Easy Crochet Beanie
difficulty level: easy
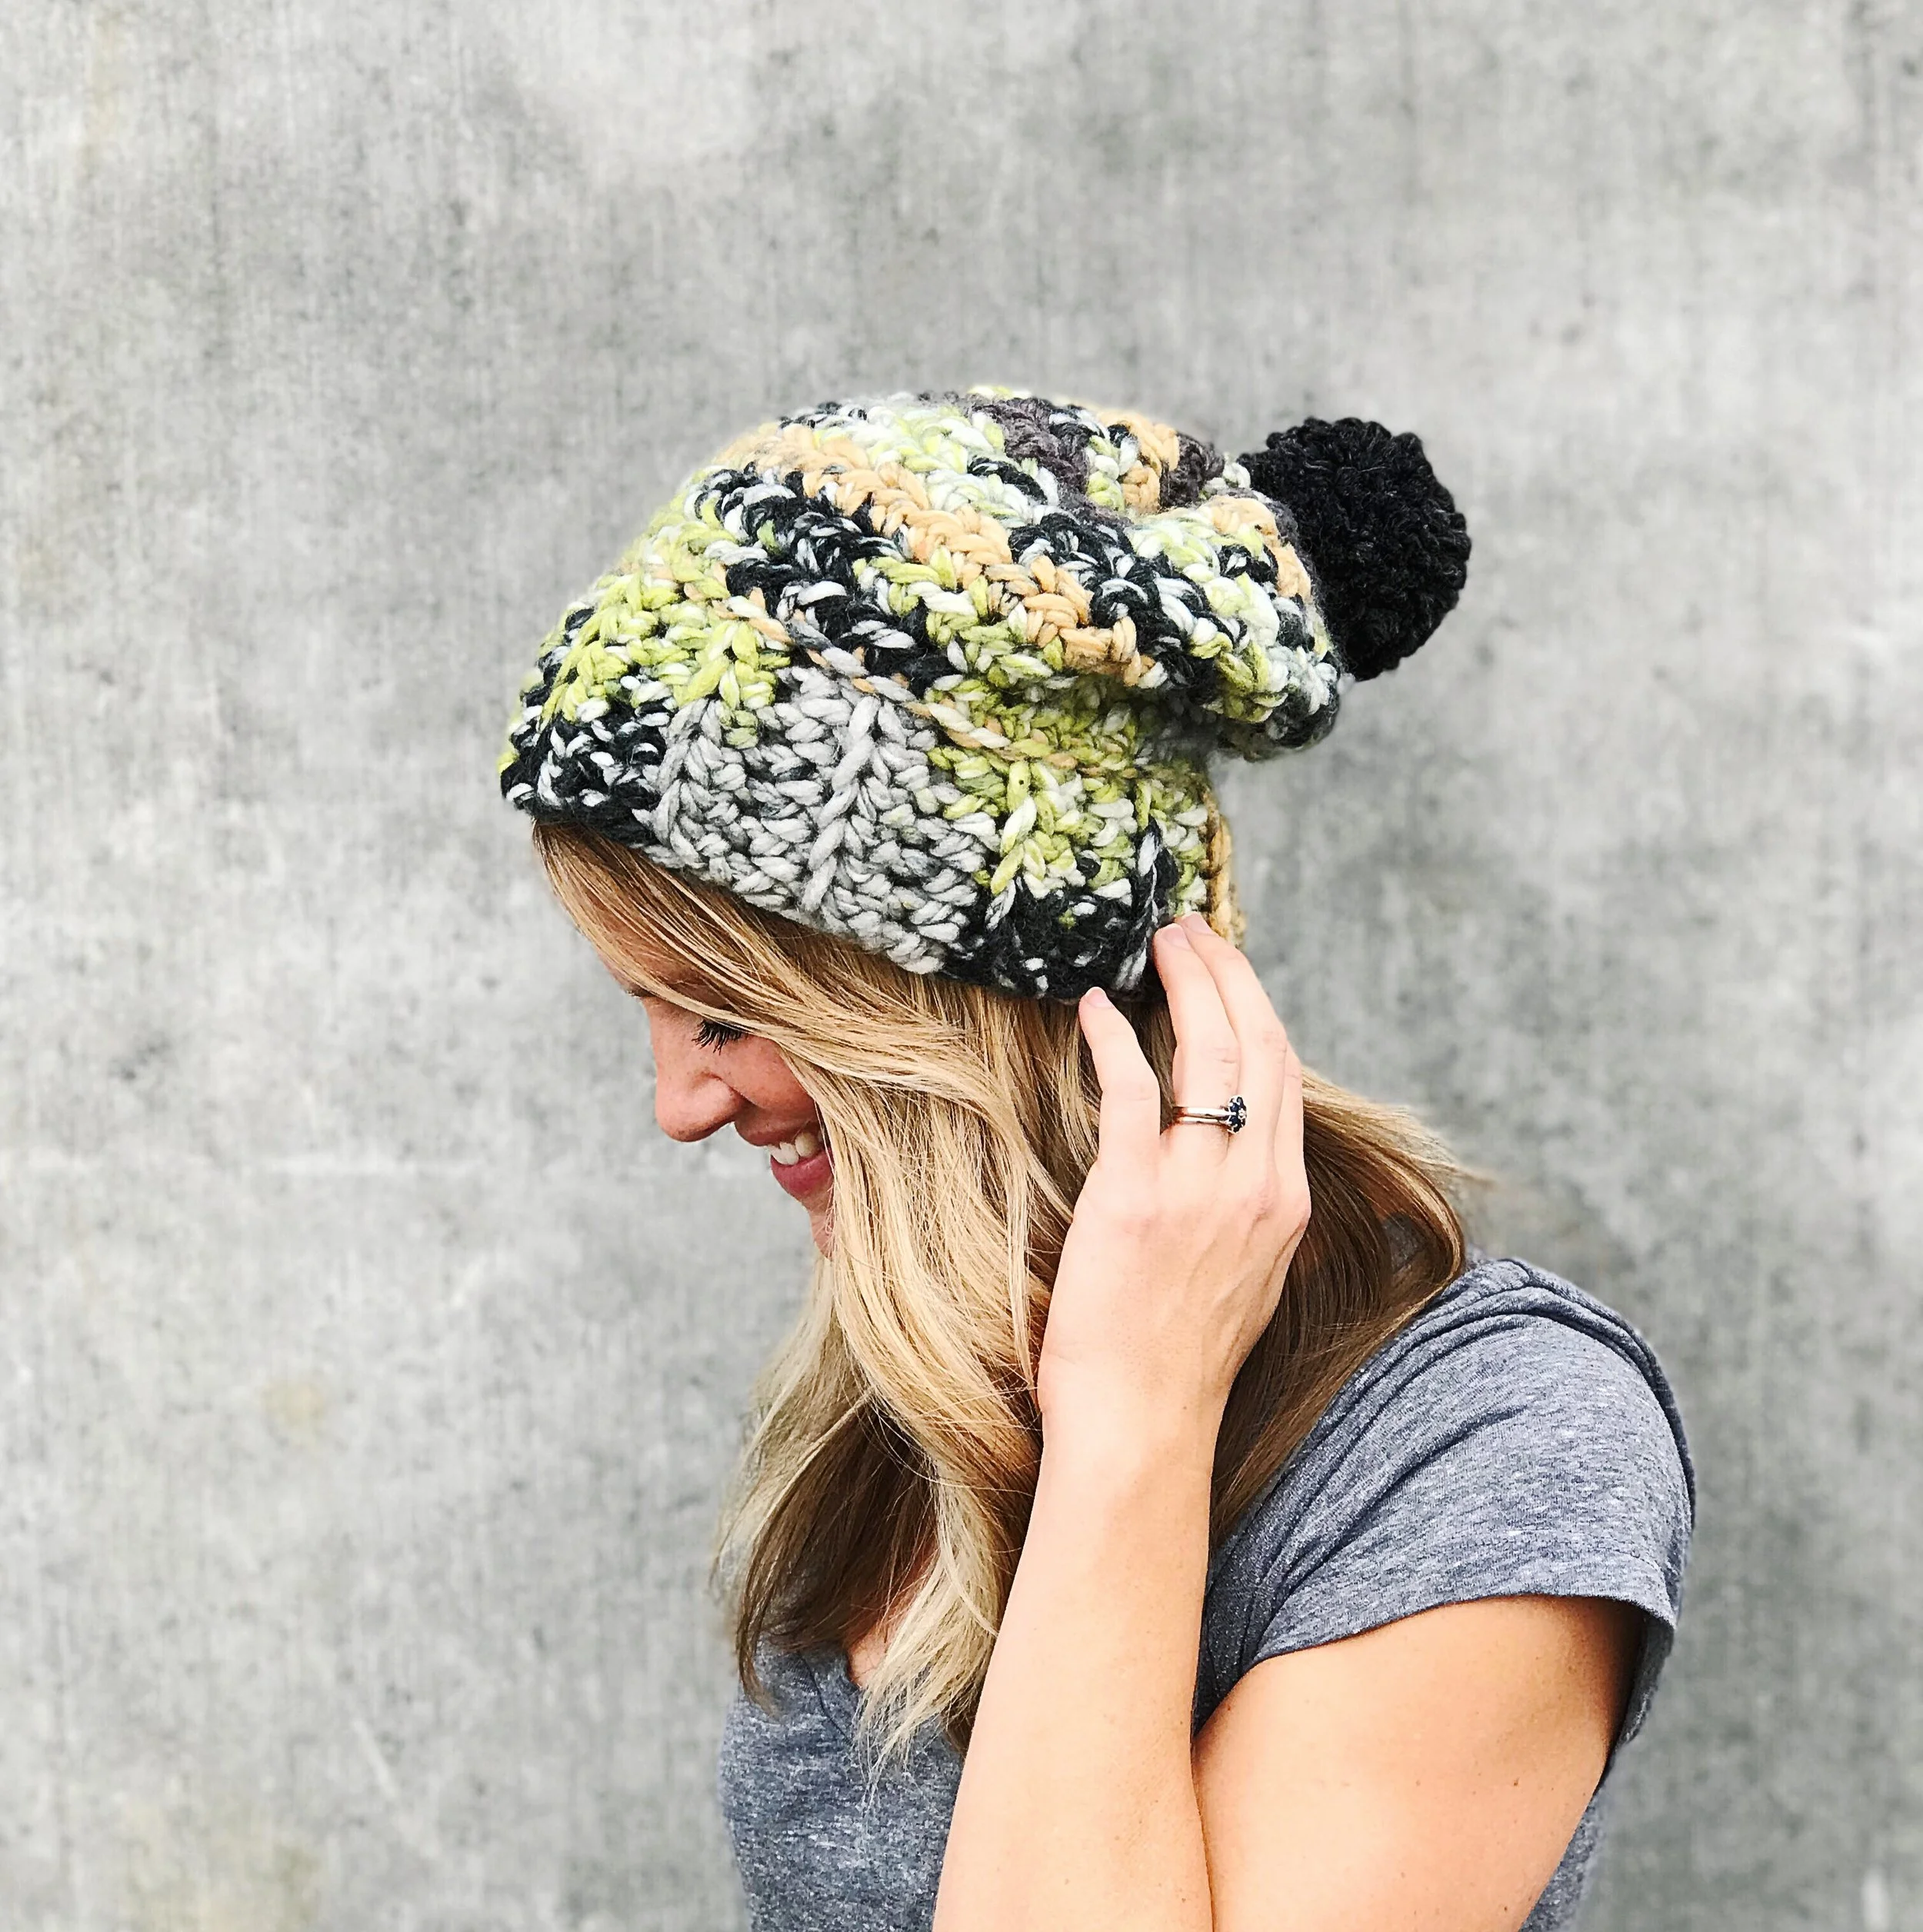
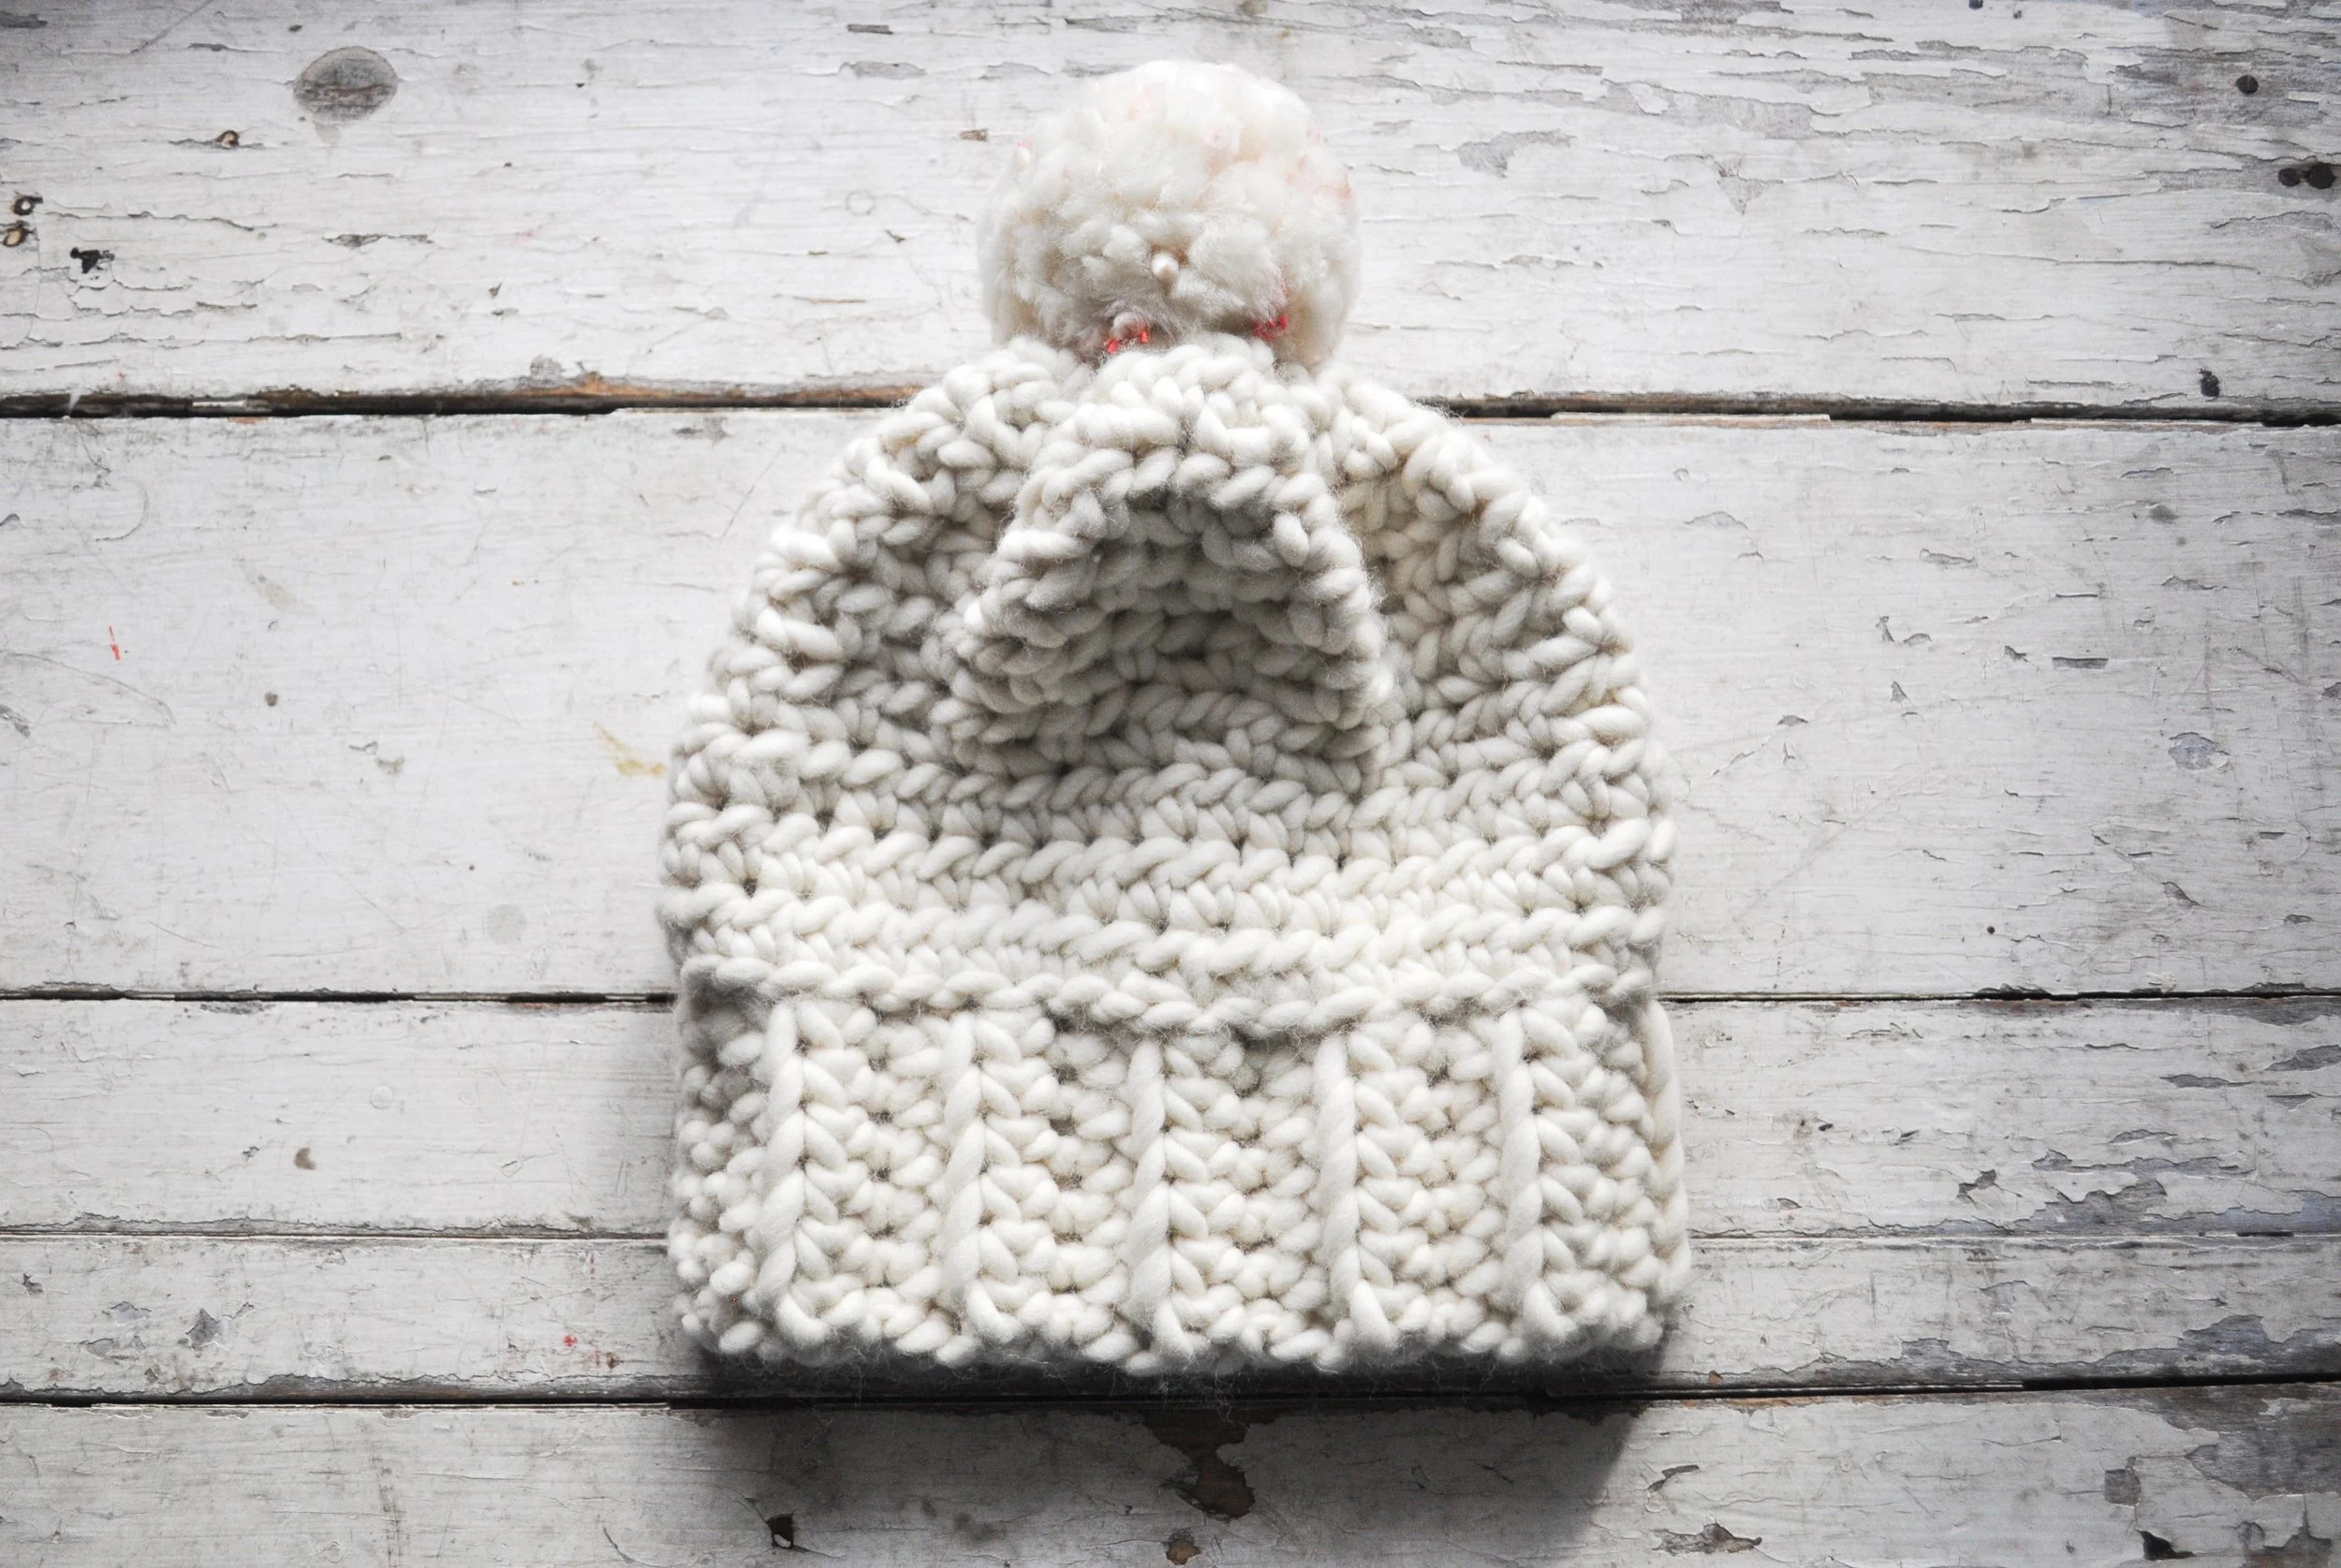
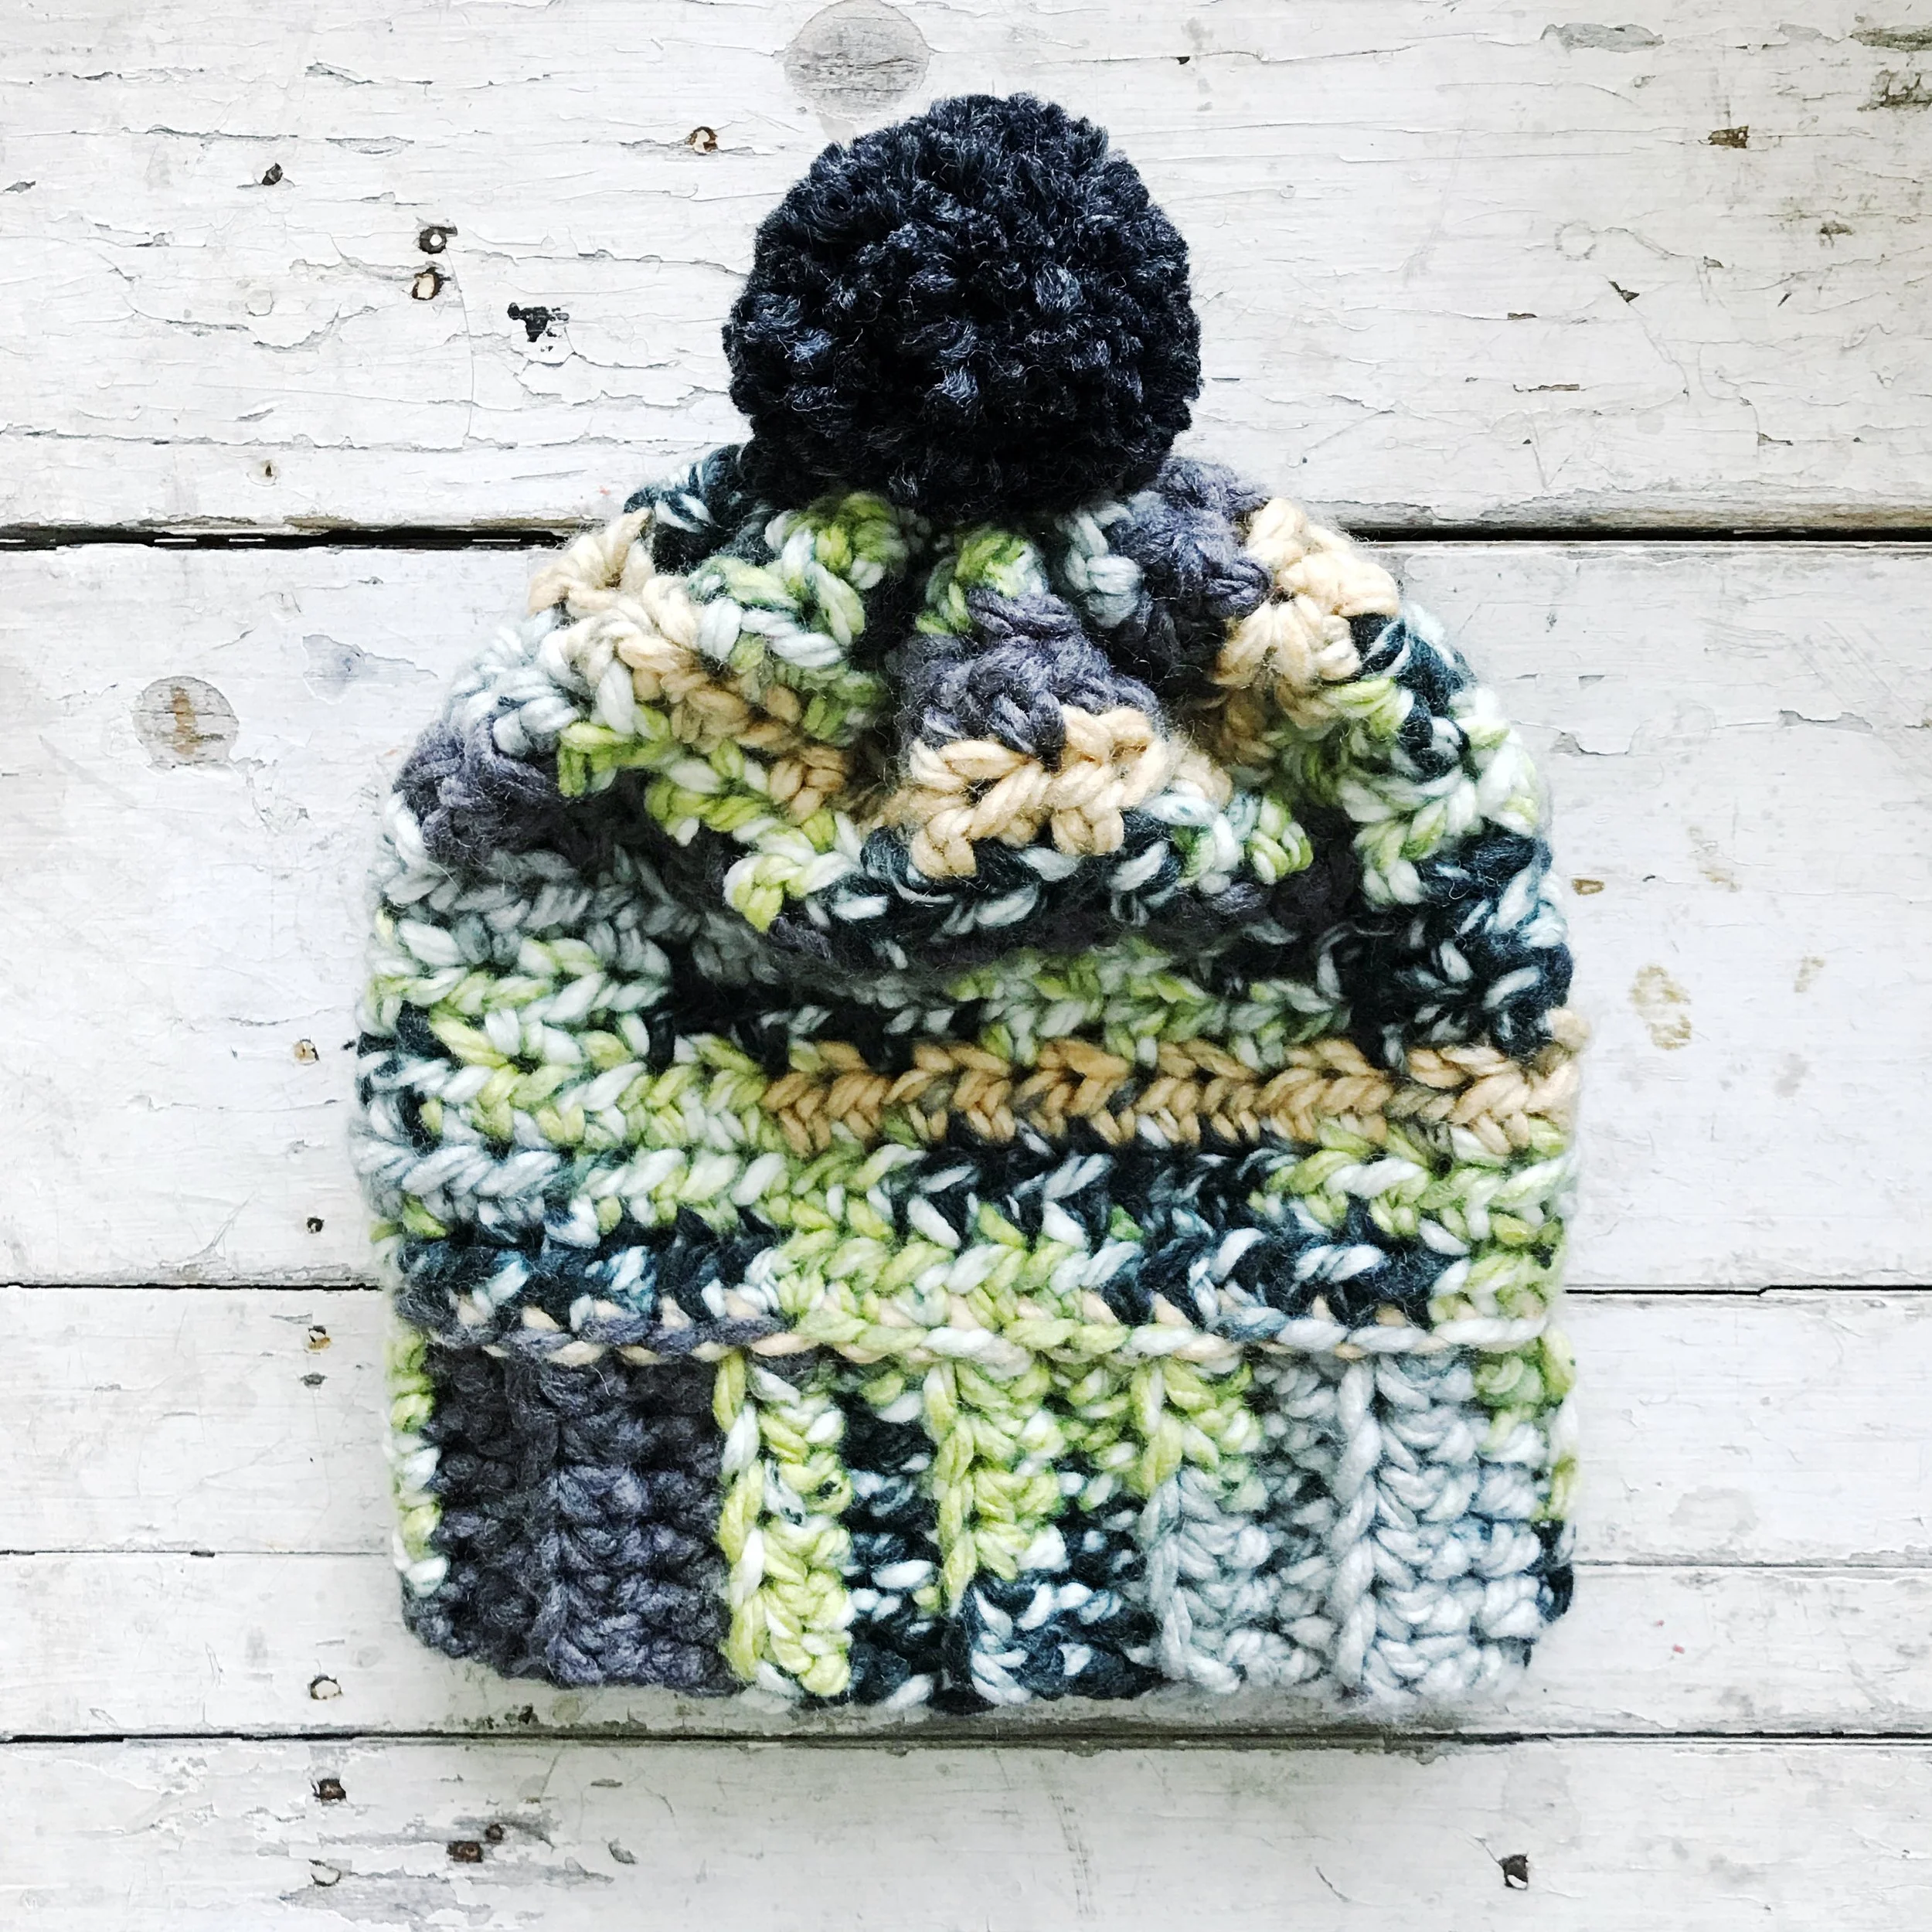
This free easy crochet beanie pattern features basic stitches that are organized beautifully, bringing you the perfect slouch and cozy factor. I especially love the border around the brim! It gives just a little added texture and finish.
This beanie is the perfect combination of laid back and sophisticated.
need a printable version?
Click the button below to download the PDF for this easy crochet beanie.
easy crochet beanie pattern
measurements:
finished beanie circumference measures approximately 23”
finished beanie height measures approximately 12” (including pom)
what you will need:
2 skeins Isaac Mizrahi Craft Lexington yarn (or approximately 125 yds) in Harlem or another #6 super bulky weight yarn.
Approximately 30 yds of Lion Brand Wool-Ease Thick & Quick in Charcoal for pom pom.
Or 2 skeins We Are Knitters The Wool (or approximately 100 yds) in Natural. I used a mixture of The Wool and scrap Knit Collage Friendship Bracelet Yarn for the pom.
Size US N/10mm crochet hook, or size needed to obtain gauge. To save time make sure to check gauge. GAUGE (with Lexington yarn): 7 SC x 7 Rows = approximately 4x4"
Tapestry needle
3-3/8” (85mm) pom pom maker (optional)
pattern notes:
For this pattern you will be working in the round and on the WS (wrong side) of your beanie throughout.
abbreviations:
CH- chain
SL ST/S – slip stitch/es
HDC – half double crochet
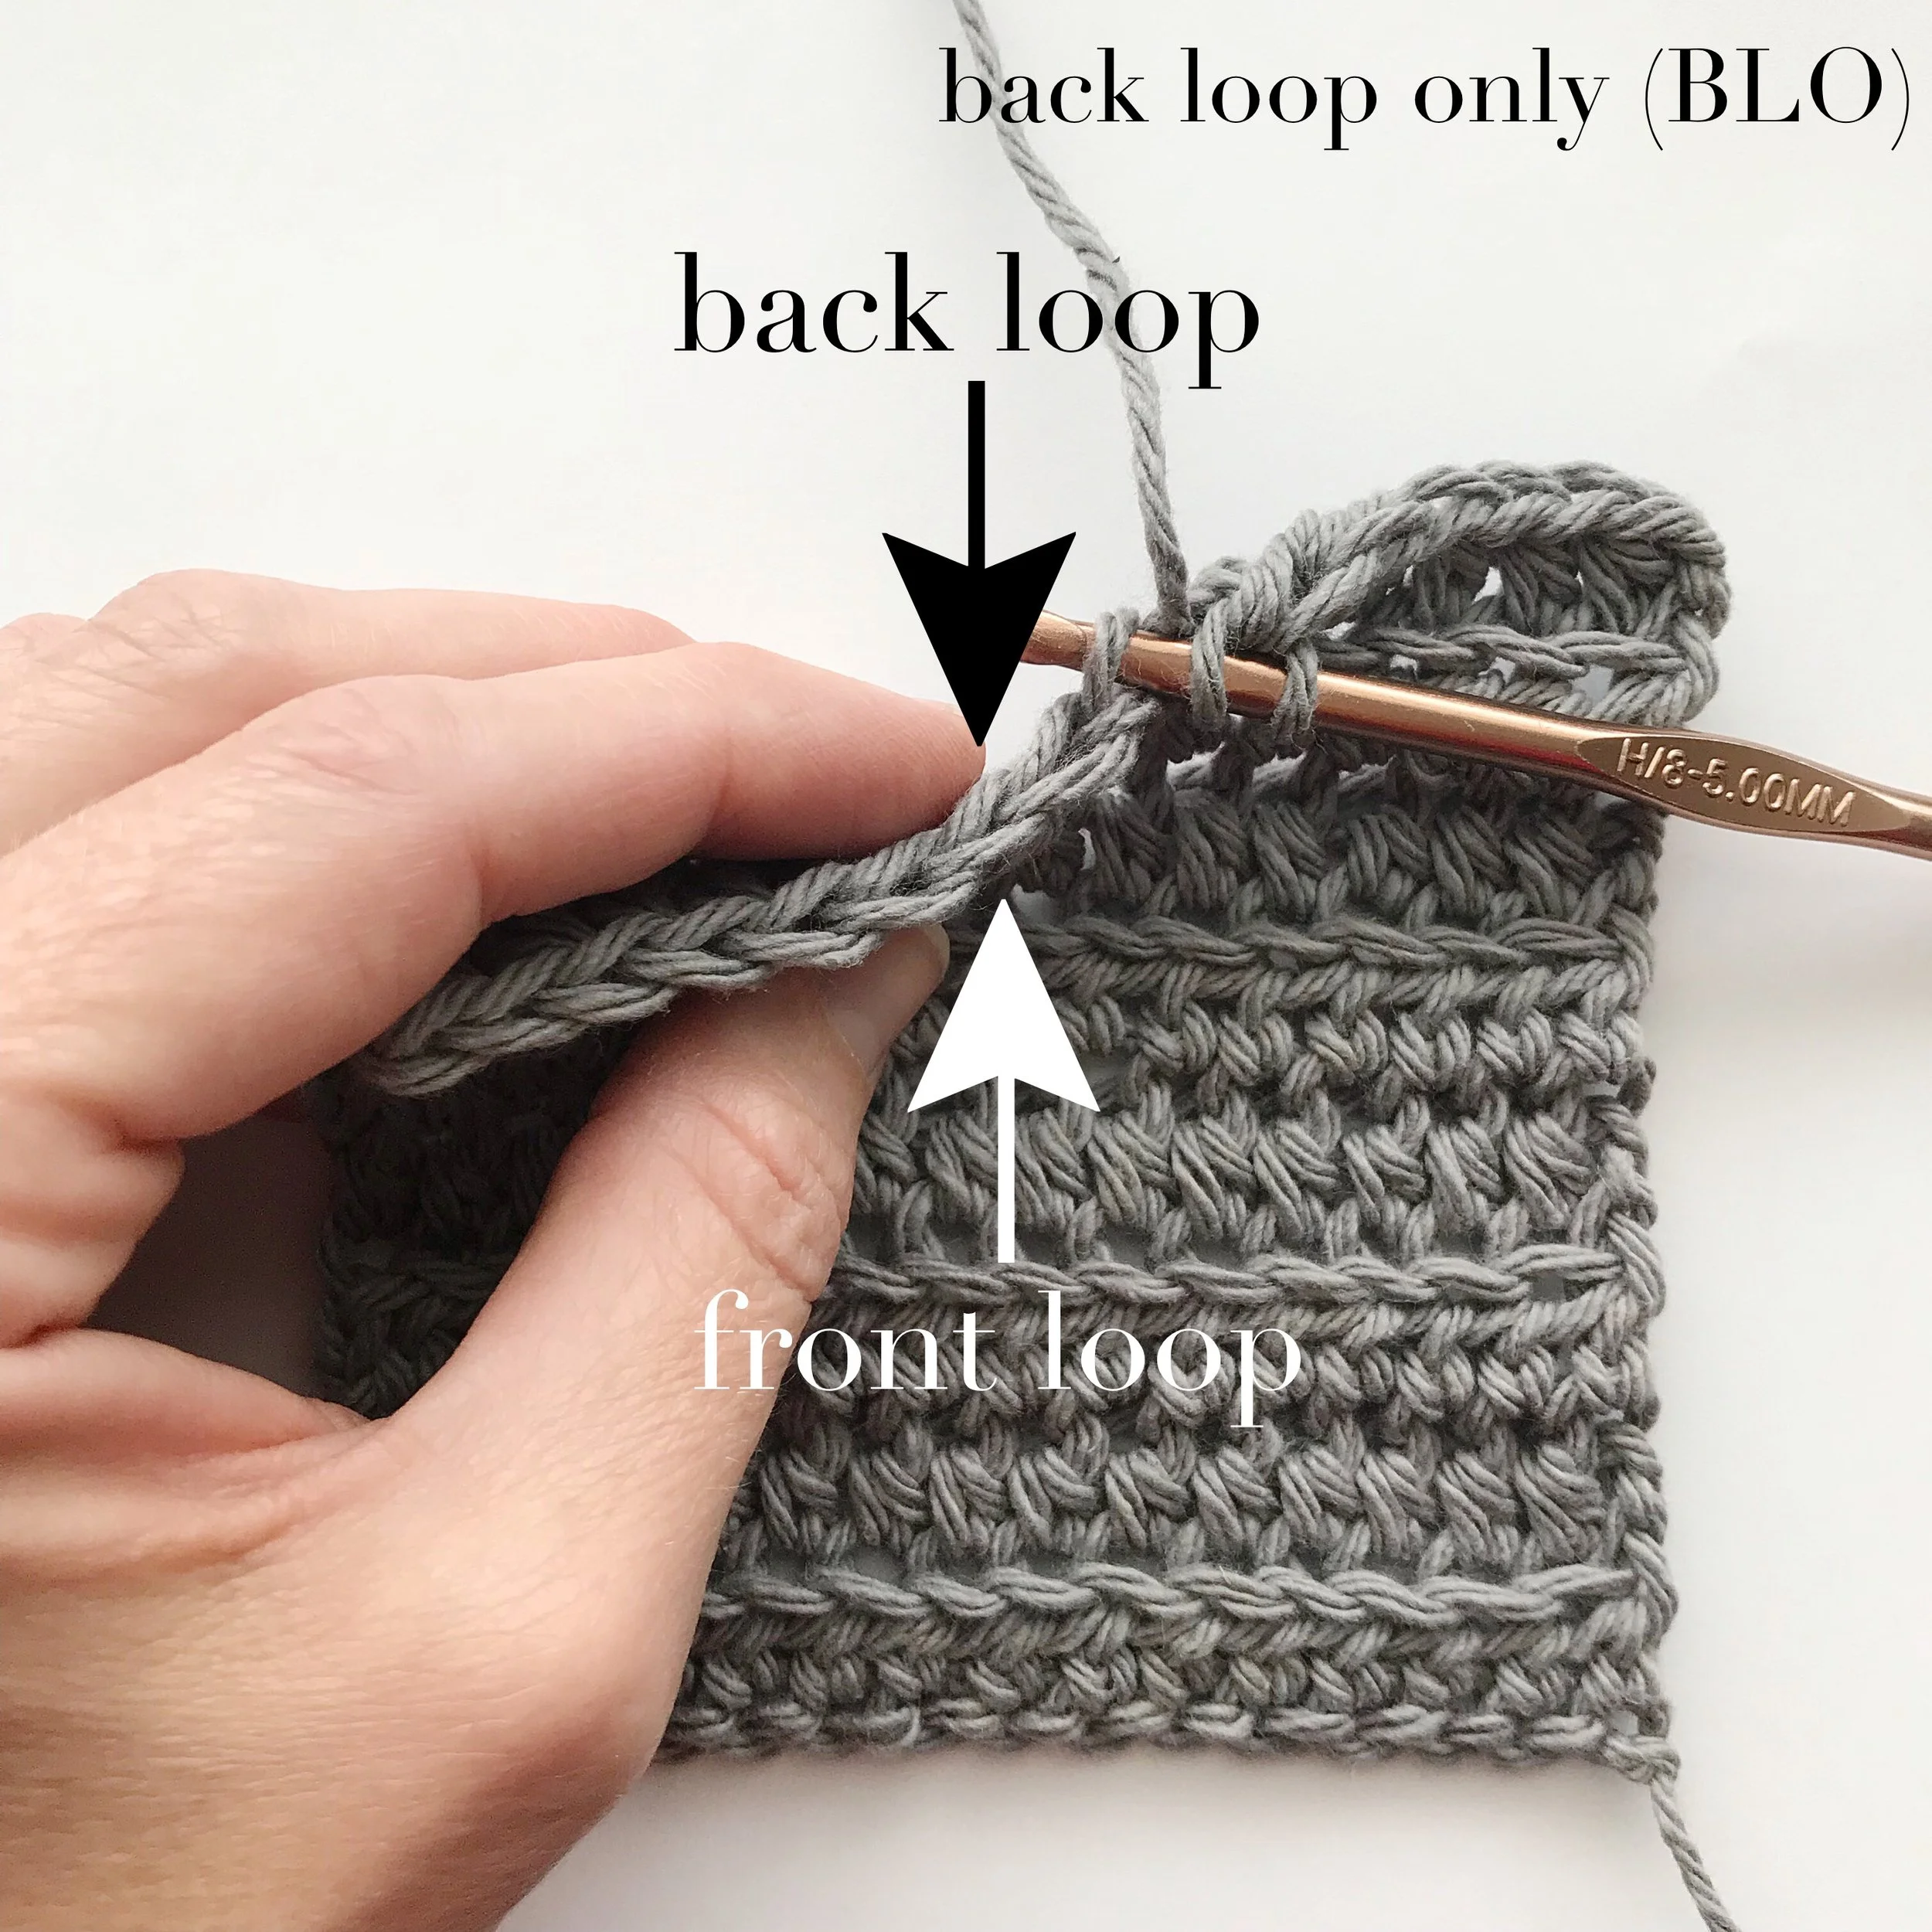
FLO– front loop only
BLO – back loop only
REP – repeat
WS – wrong side
FO – fasten off
special stitches:
Front loop only (FLO) for HDC - (see white arrow for front loop of ST) yarn over, insert hook in the front loop of the current stitch you are working on, yarn over, pull up a loop, yarn over and pull through 3 loops on hook.
Back loop only (BLO) for HDC – (see black arrow for back loop of ST) yarn over, insert hook in the back loop (as shown in photo below) of the next ST, yarn over, pull up a loop, yarn over and pull through 3 loops on hook.
enjoy videos more?
If videos are more your jam, here is a step-by-step video tutorial for this easy crochet beanie. Press play! :)
easy crochet beanie
pattern:
Brim
Note: do not count CH 2 as first HDC for brim.
CH 7
Row 1: HDC in second CH from hook and in each CH across; CH 2, turn. (6 HDC)
Row 2: HDC in BLO of first HDC and in each HDC across; CH 2, turn.
Rows 3-23: REP row 2. (6 HDC)
SL ST band together to make a circle. Do not FO.
Beanie body
Note: You will now be working in the round and on the wrong side (WS) of your beanie. Do not count CH 2 as first HDC throughout the body of the beanie.
Round 1: SL ST loosely and evenly around edge of brim 35 times; join with SL ST in first SL ST. (35 SL STS)
Round 2: CH 2, 2 HDC in same SL ST, HDC in next 6 SL STS; *2 HDC in next SL ST, HDC in next 6 SL STS; REP from * around; join with SL ST in first HDC. (40 HDC)
Round 3: CH 2, HDC in same HDC and in each HDC around; join with SL ST in first HDC.
Round 4: REP round 3.
Round 5: CH 2, HDC in same HDC, HDC in FLO of next HDC, *HDC in next HDC, HDC in FLO of next HDC, REP from * around; join with SL ST in first HDC.
Rounds 6-10: REP round 5. (40 HDC)
Leave a long tail for weaving, (around 20”) FO. Using long yarn tail, weave in and out between each HDC, pull together very tightly to close hole. Using tapestry needle, weave under a stitch, and tie a knot tightly.
pom pom:
If using a pom pom maker
Wrap yarn around three times on each side of 3-3/8” (85mm) pom pom maker to achieve optimal thickness. Trim pom pom (fluff as you go, and be careful not to cut yarn tail) until pom pom looks uniform all around.
If you are NOT using a pom pom maker
Starting with the end of yarn in the palm of your hand, wrap yarn loosely around 4 fingers approximately 50 times or until desired thickness is achieved. (See photo #1. Photo is just an example of placement and not wrapped 50 times.

1
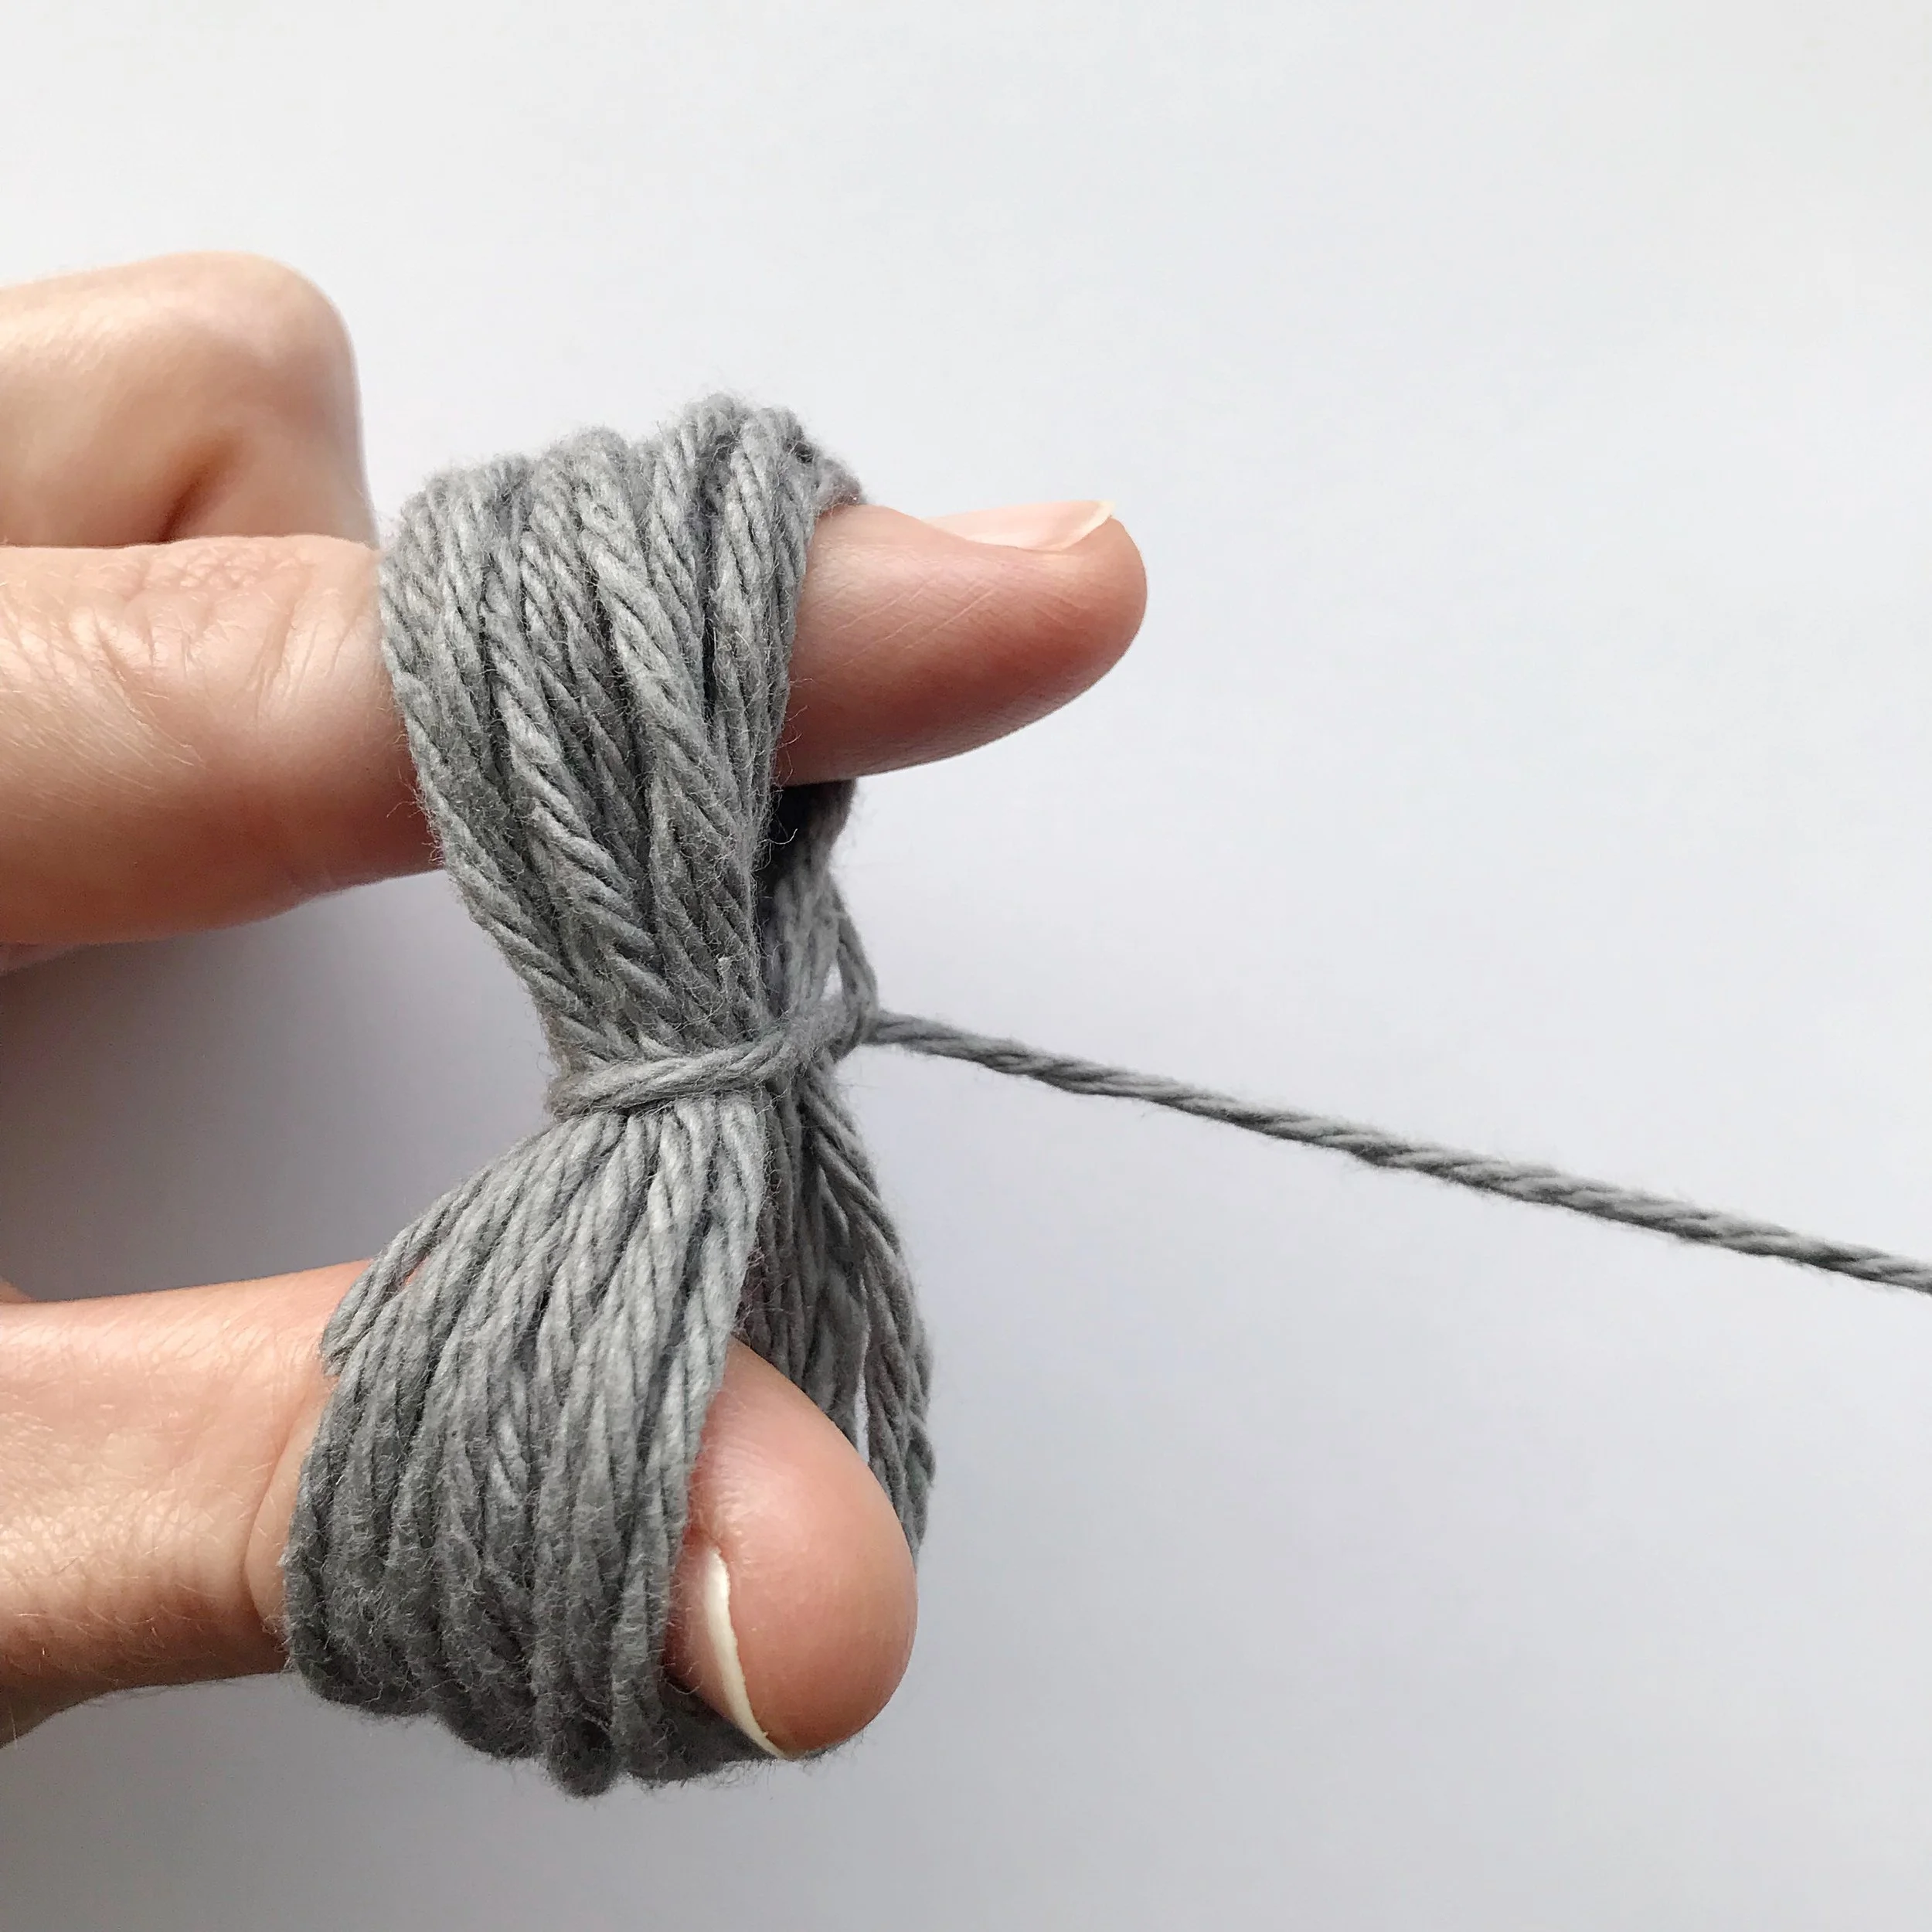
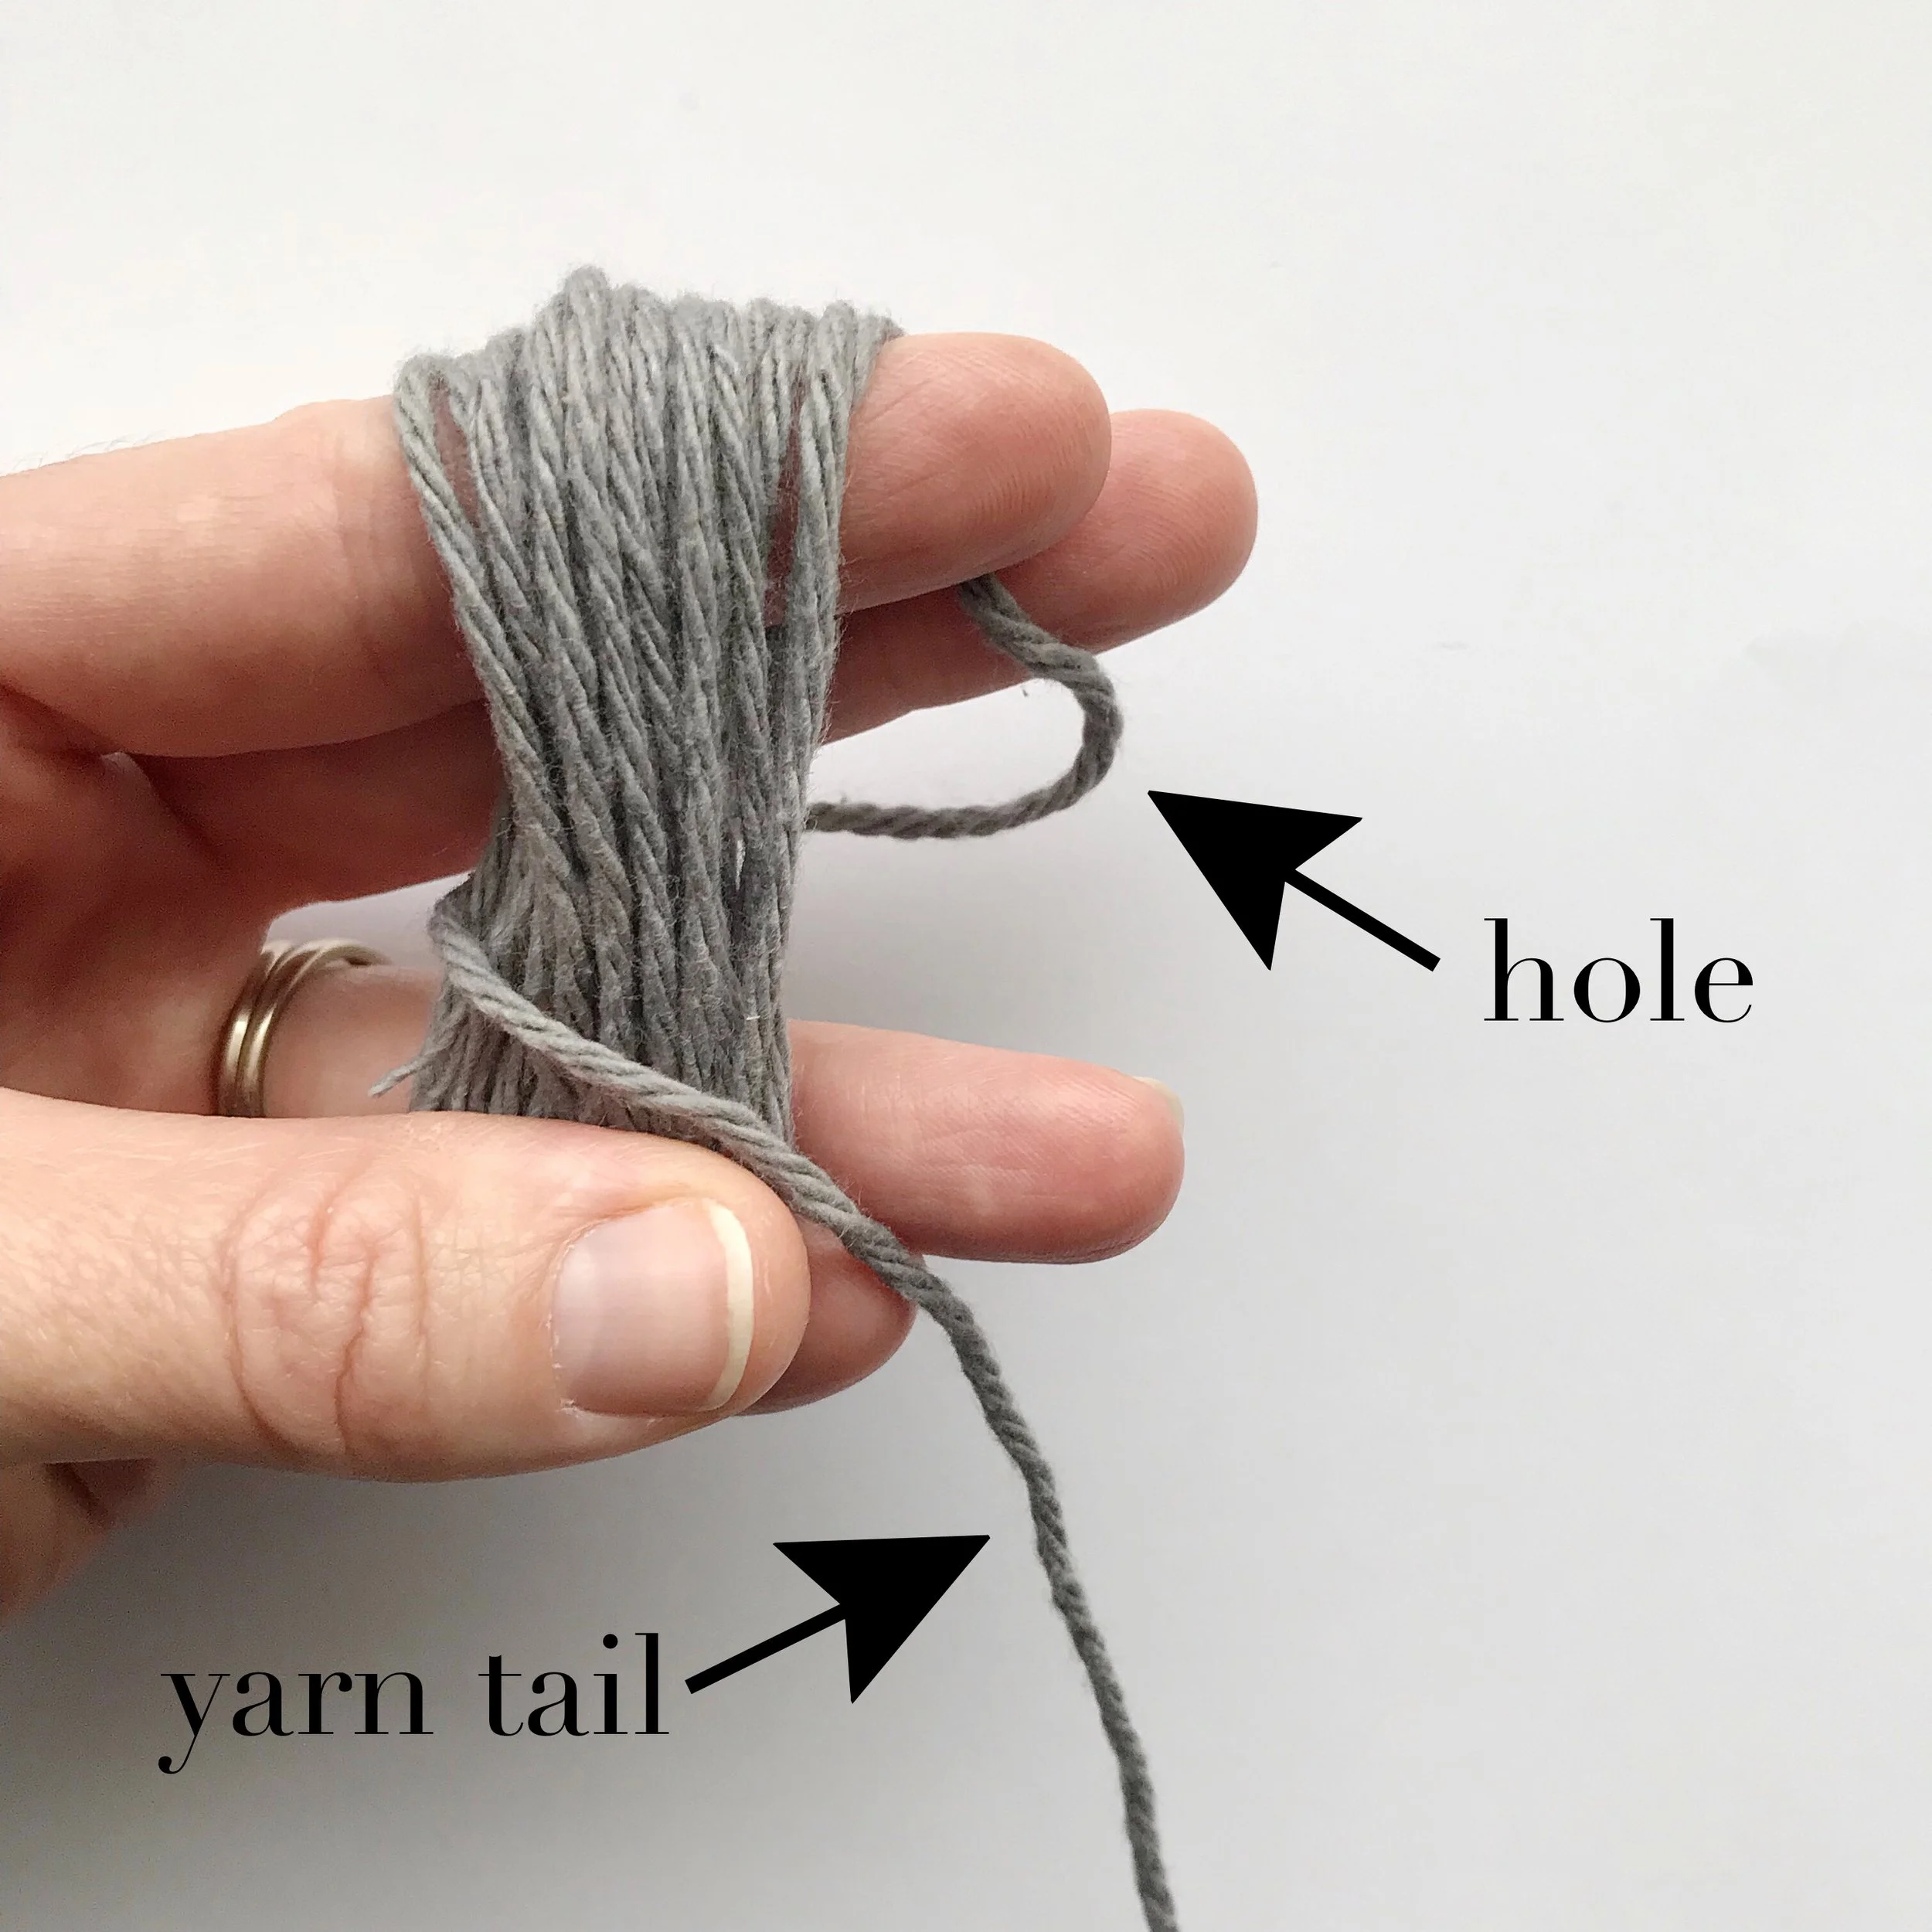
Leave long tail (around 30”) with remaining yarn. With opposite hand, pinching yarn in the middle, slide wrapped yarn off of 3 of 4 fingers. *Form hole with yarn tail at the back of your wrapped yarn. Being careful not to disrupt hole, bring yarn tail around back of wrapped yarn (photo #2). Place thumb inside wrapped yarn for stability and bring yarn tail through the hole. (photo #3)
4
2
5
3
6
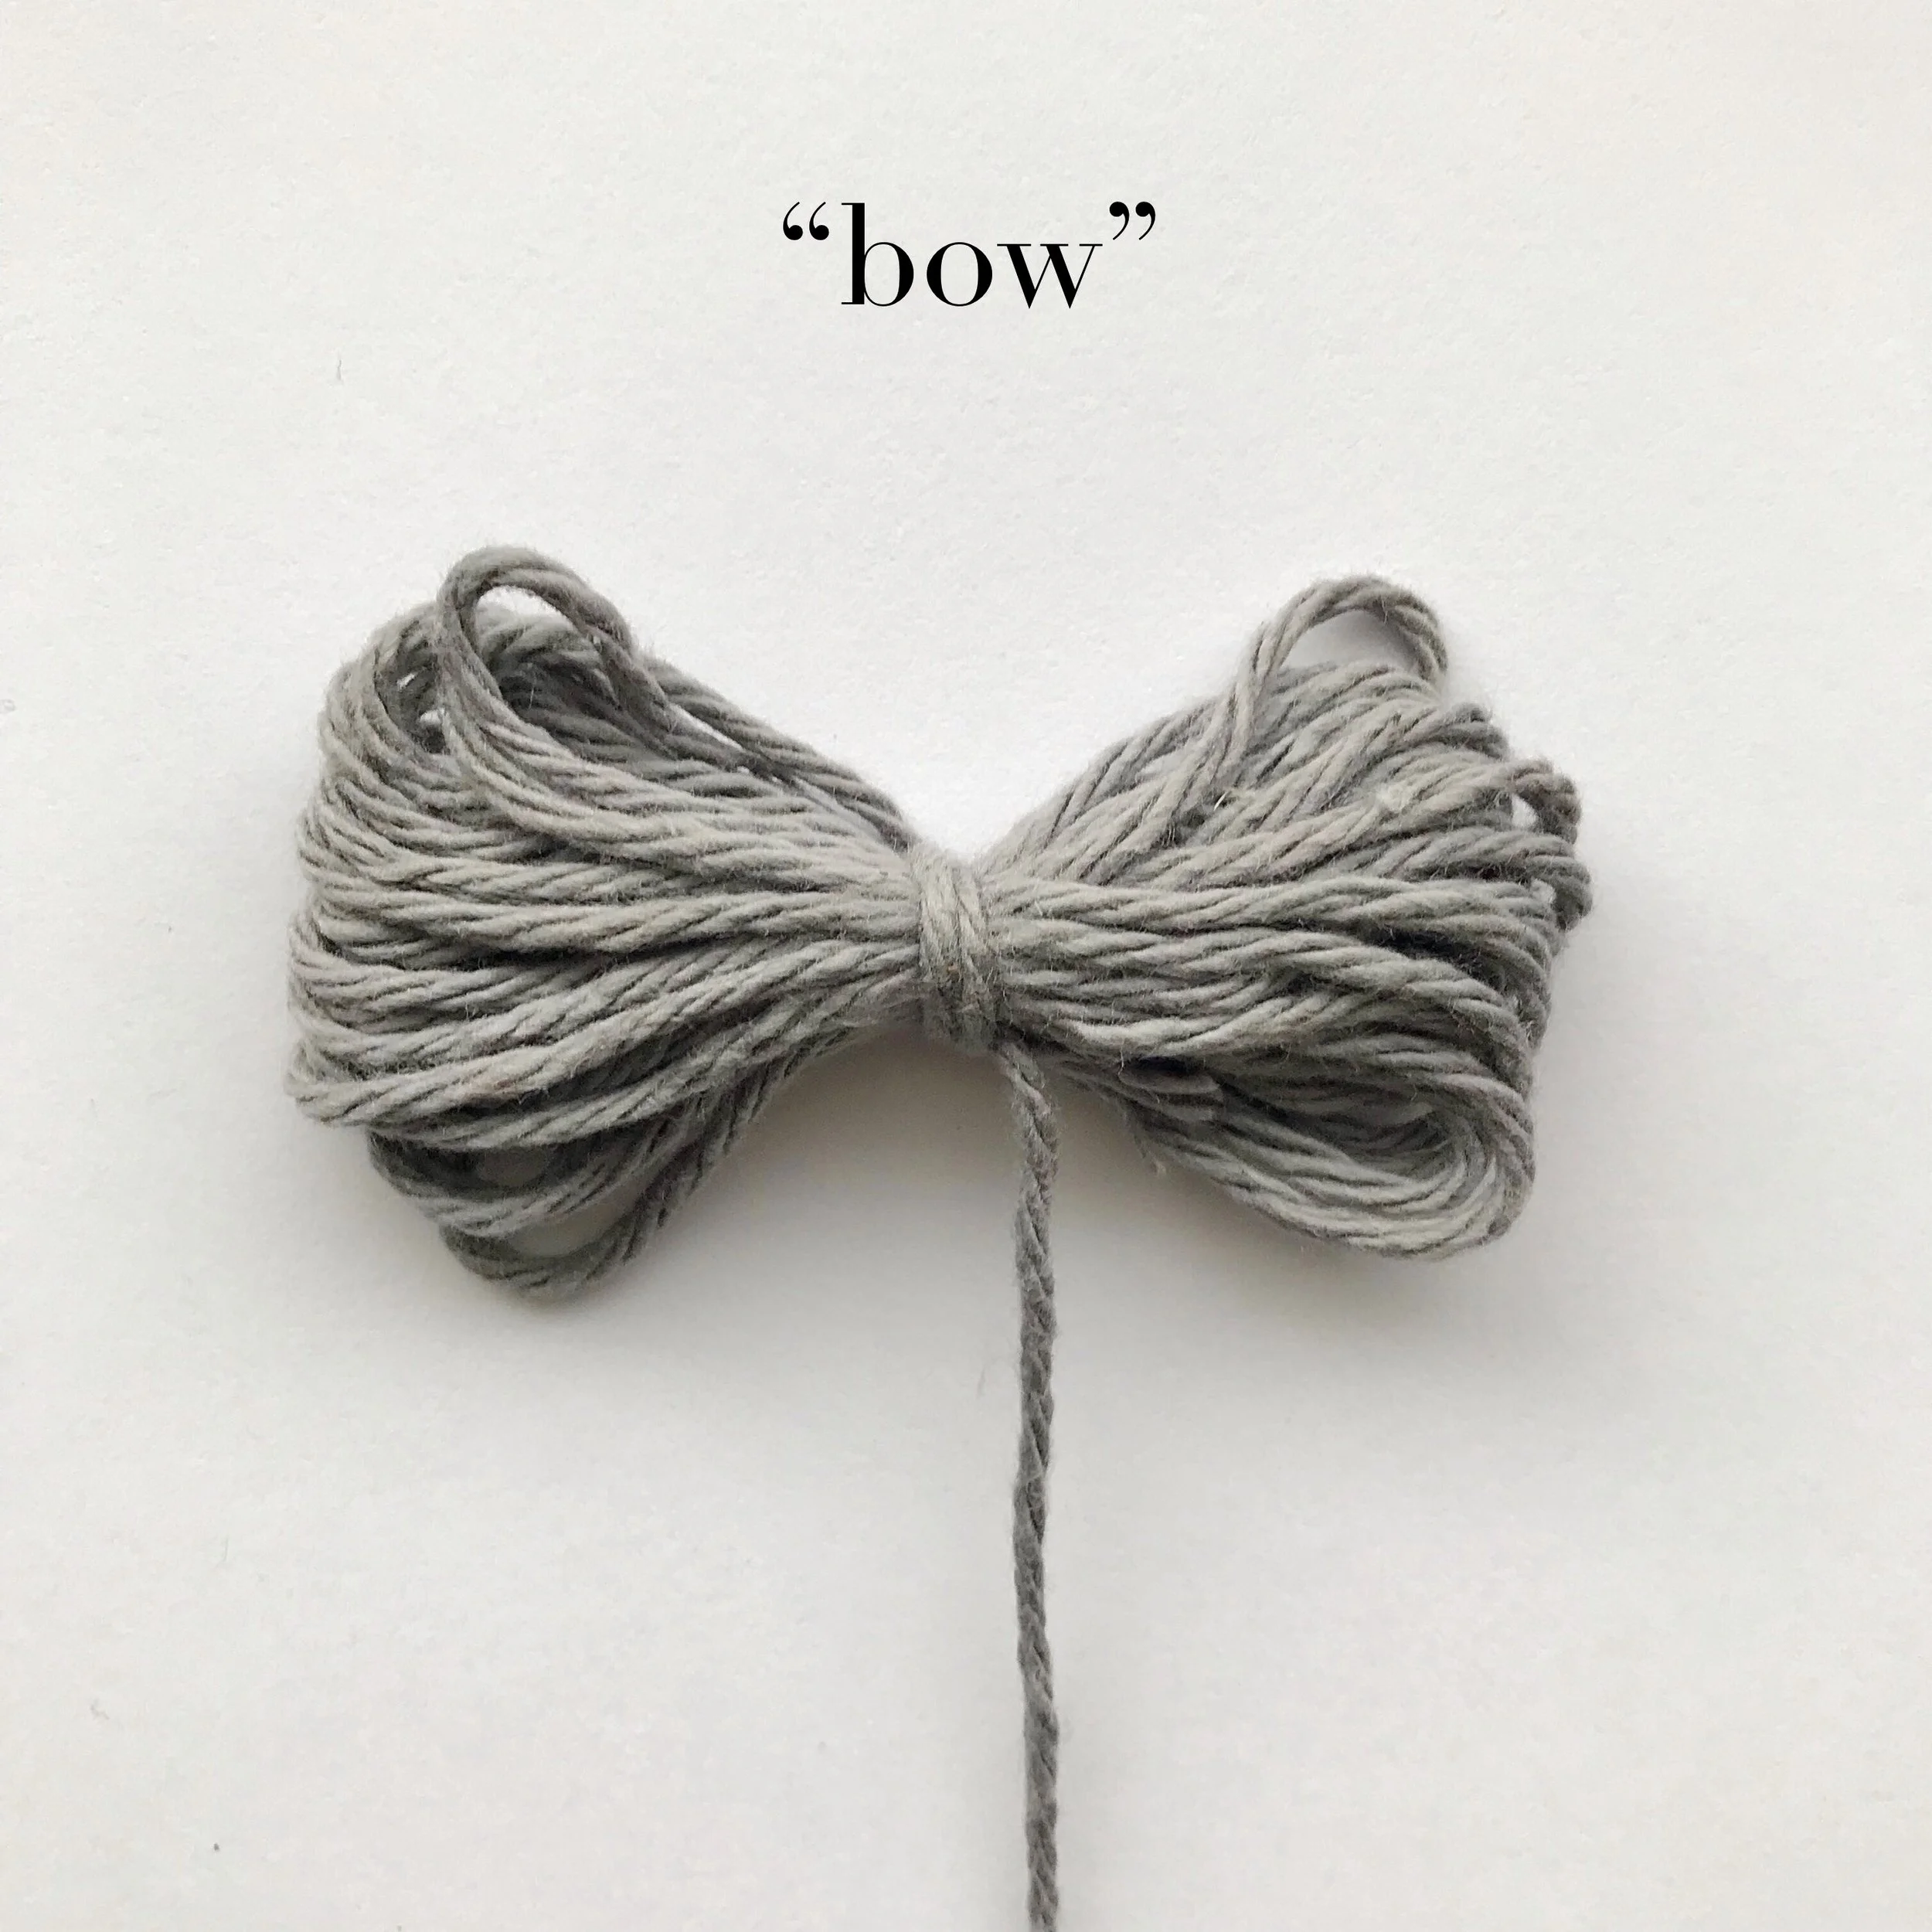
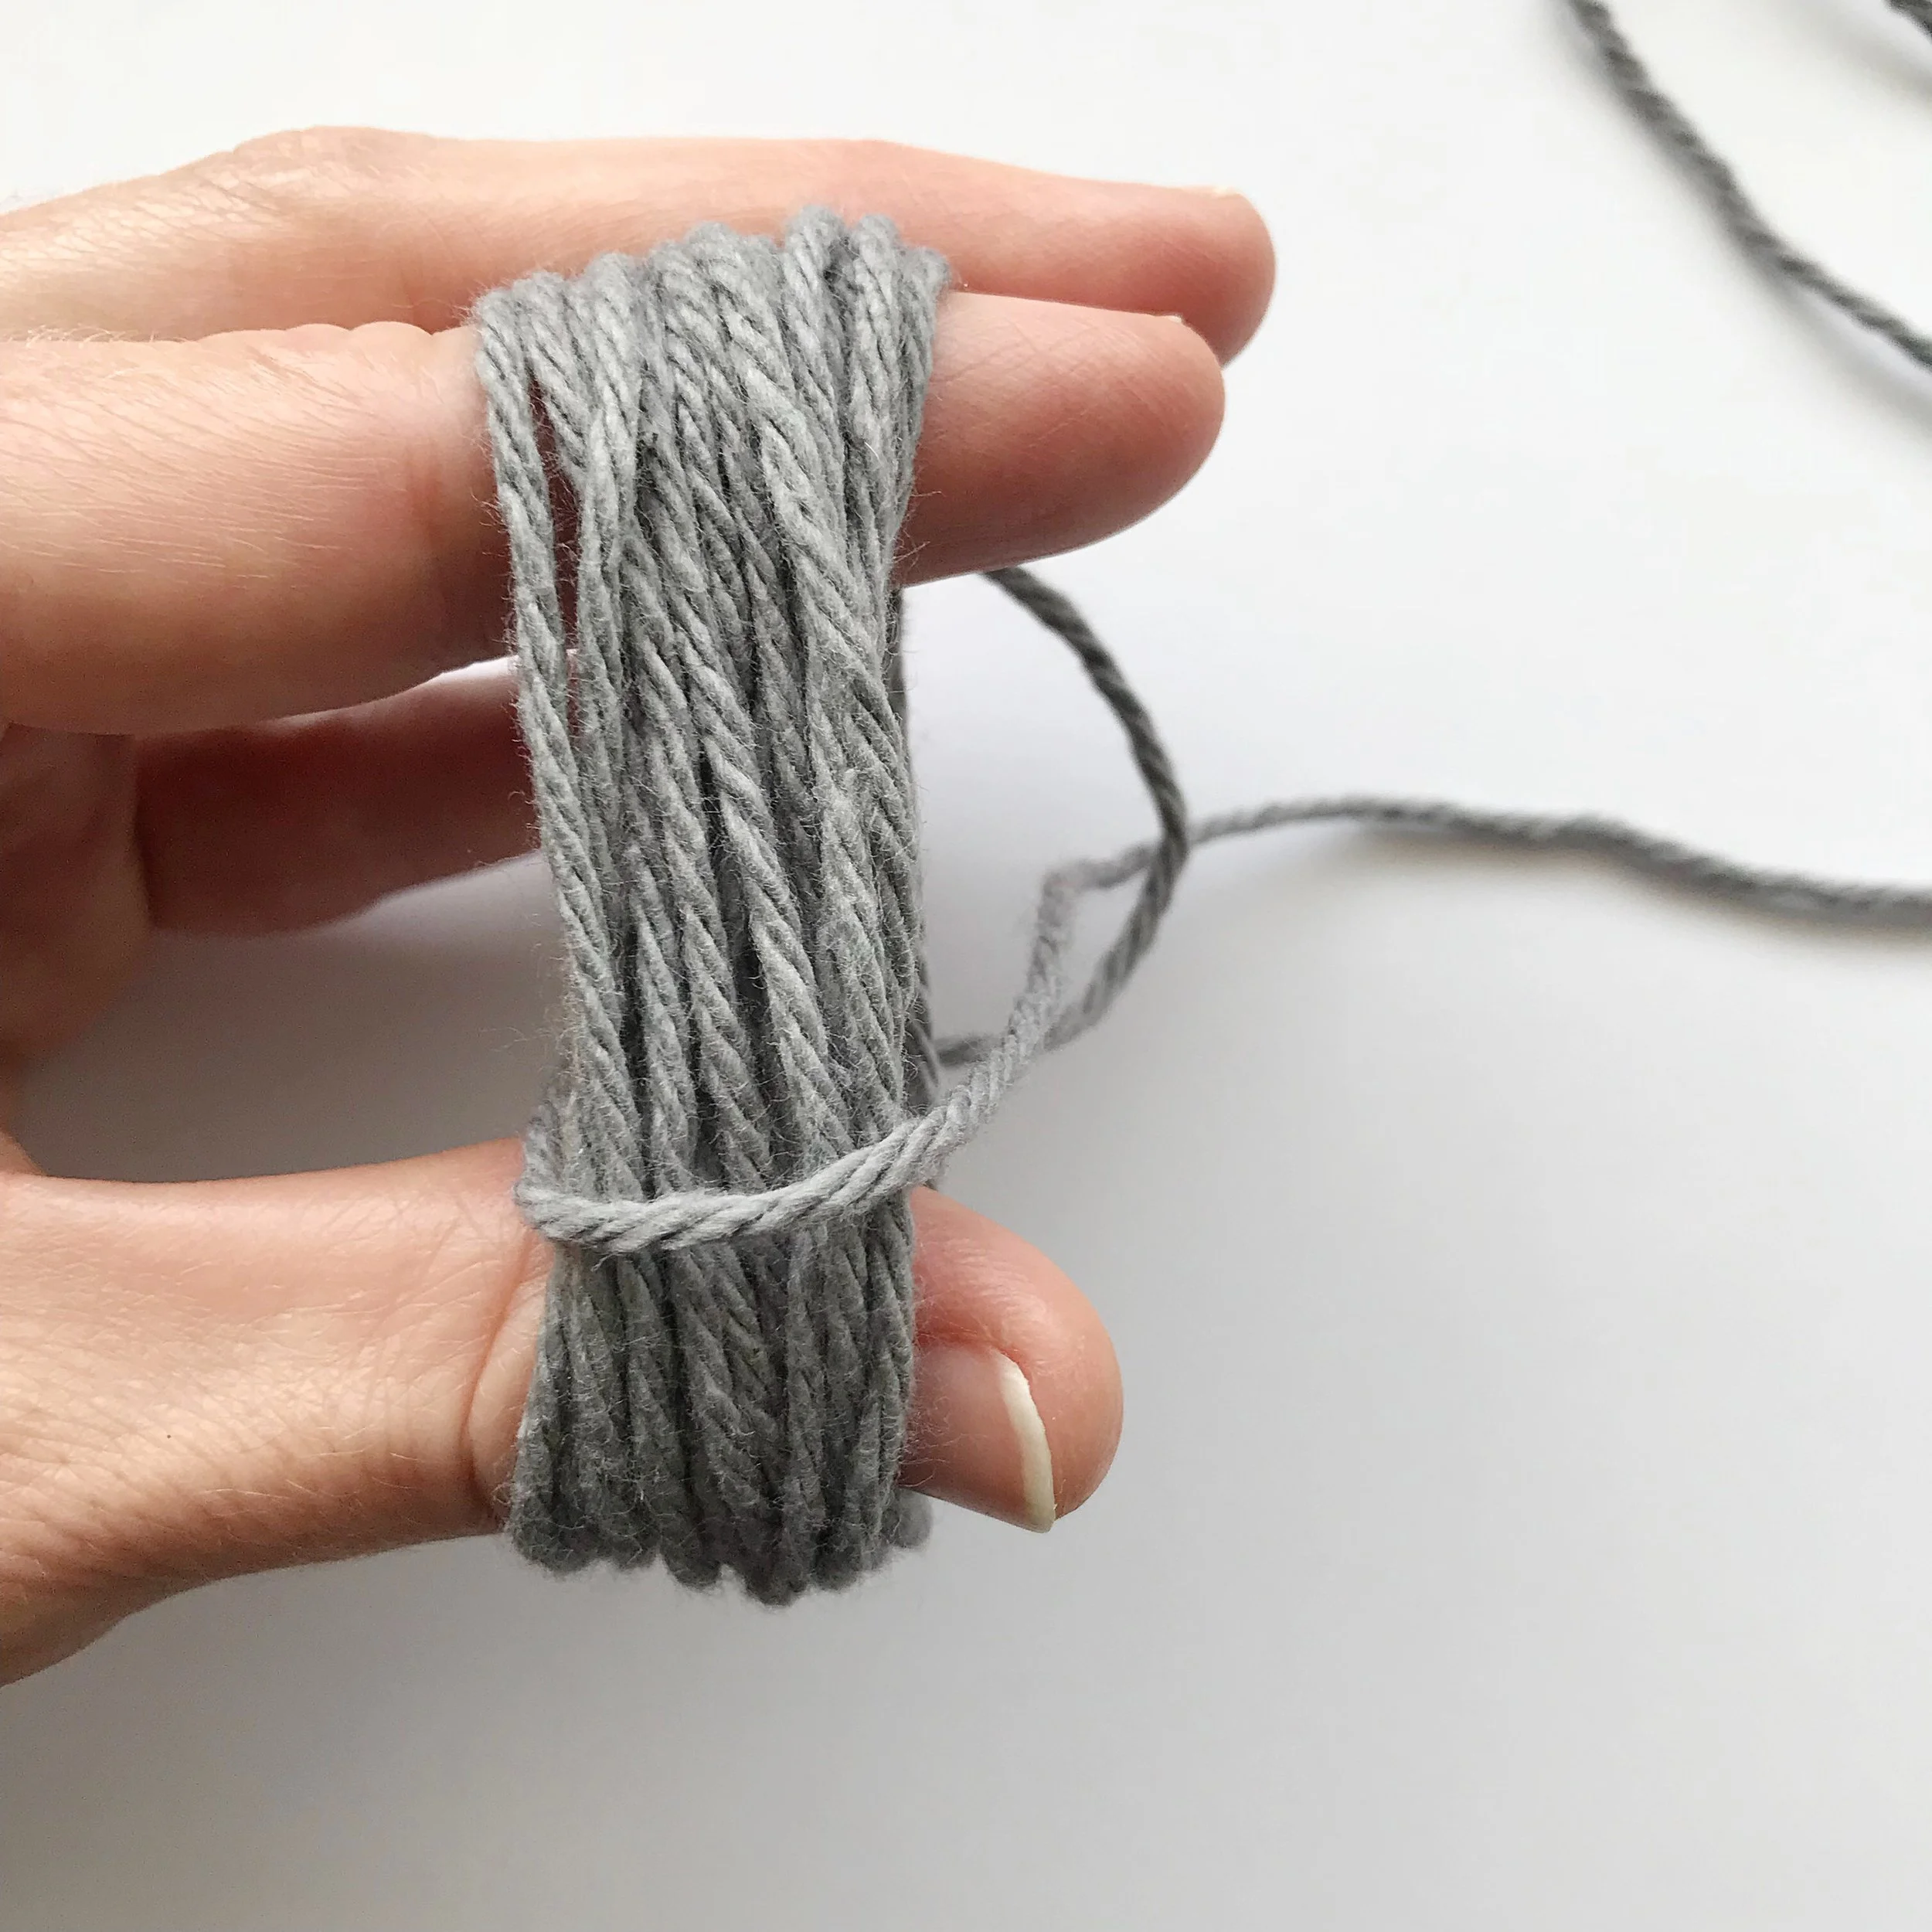
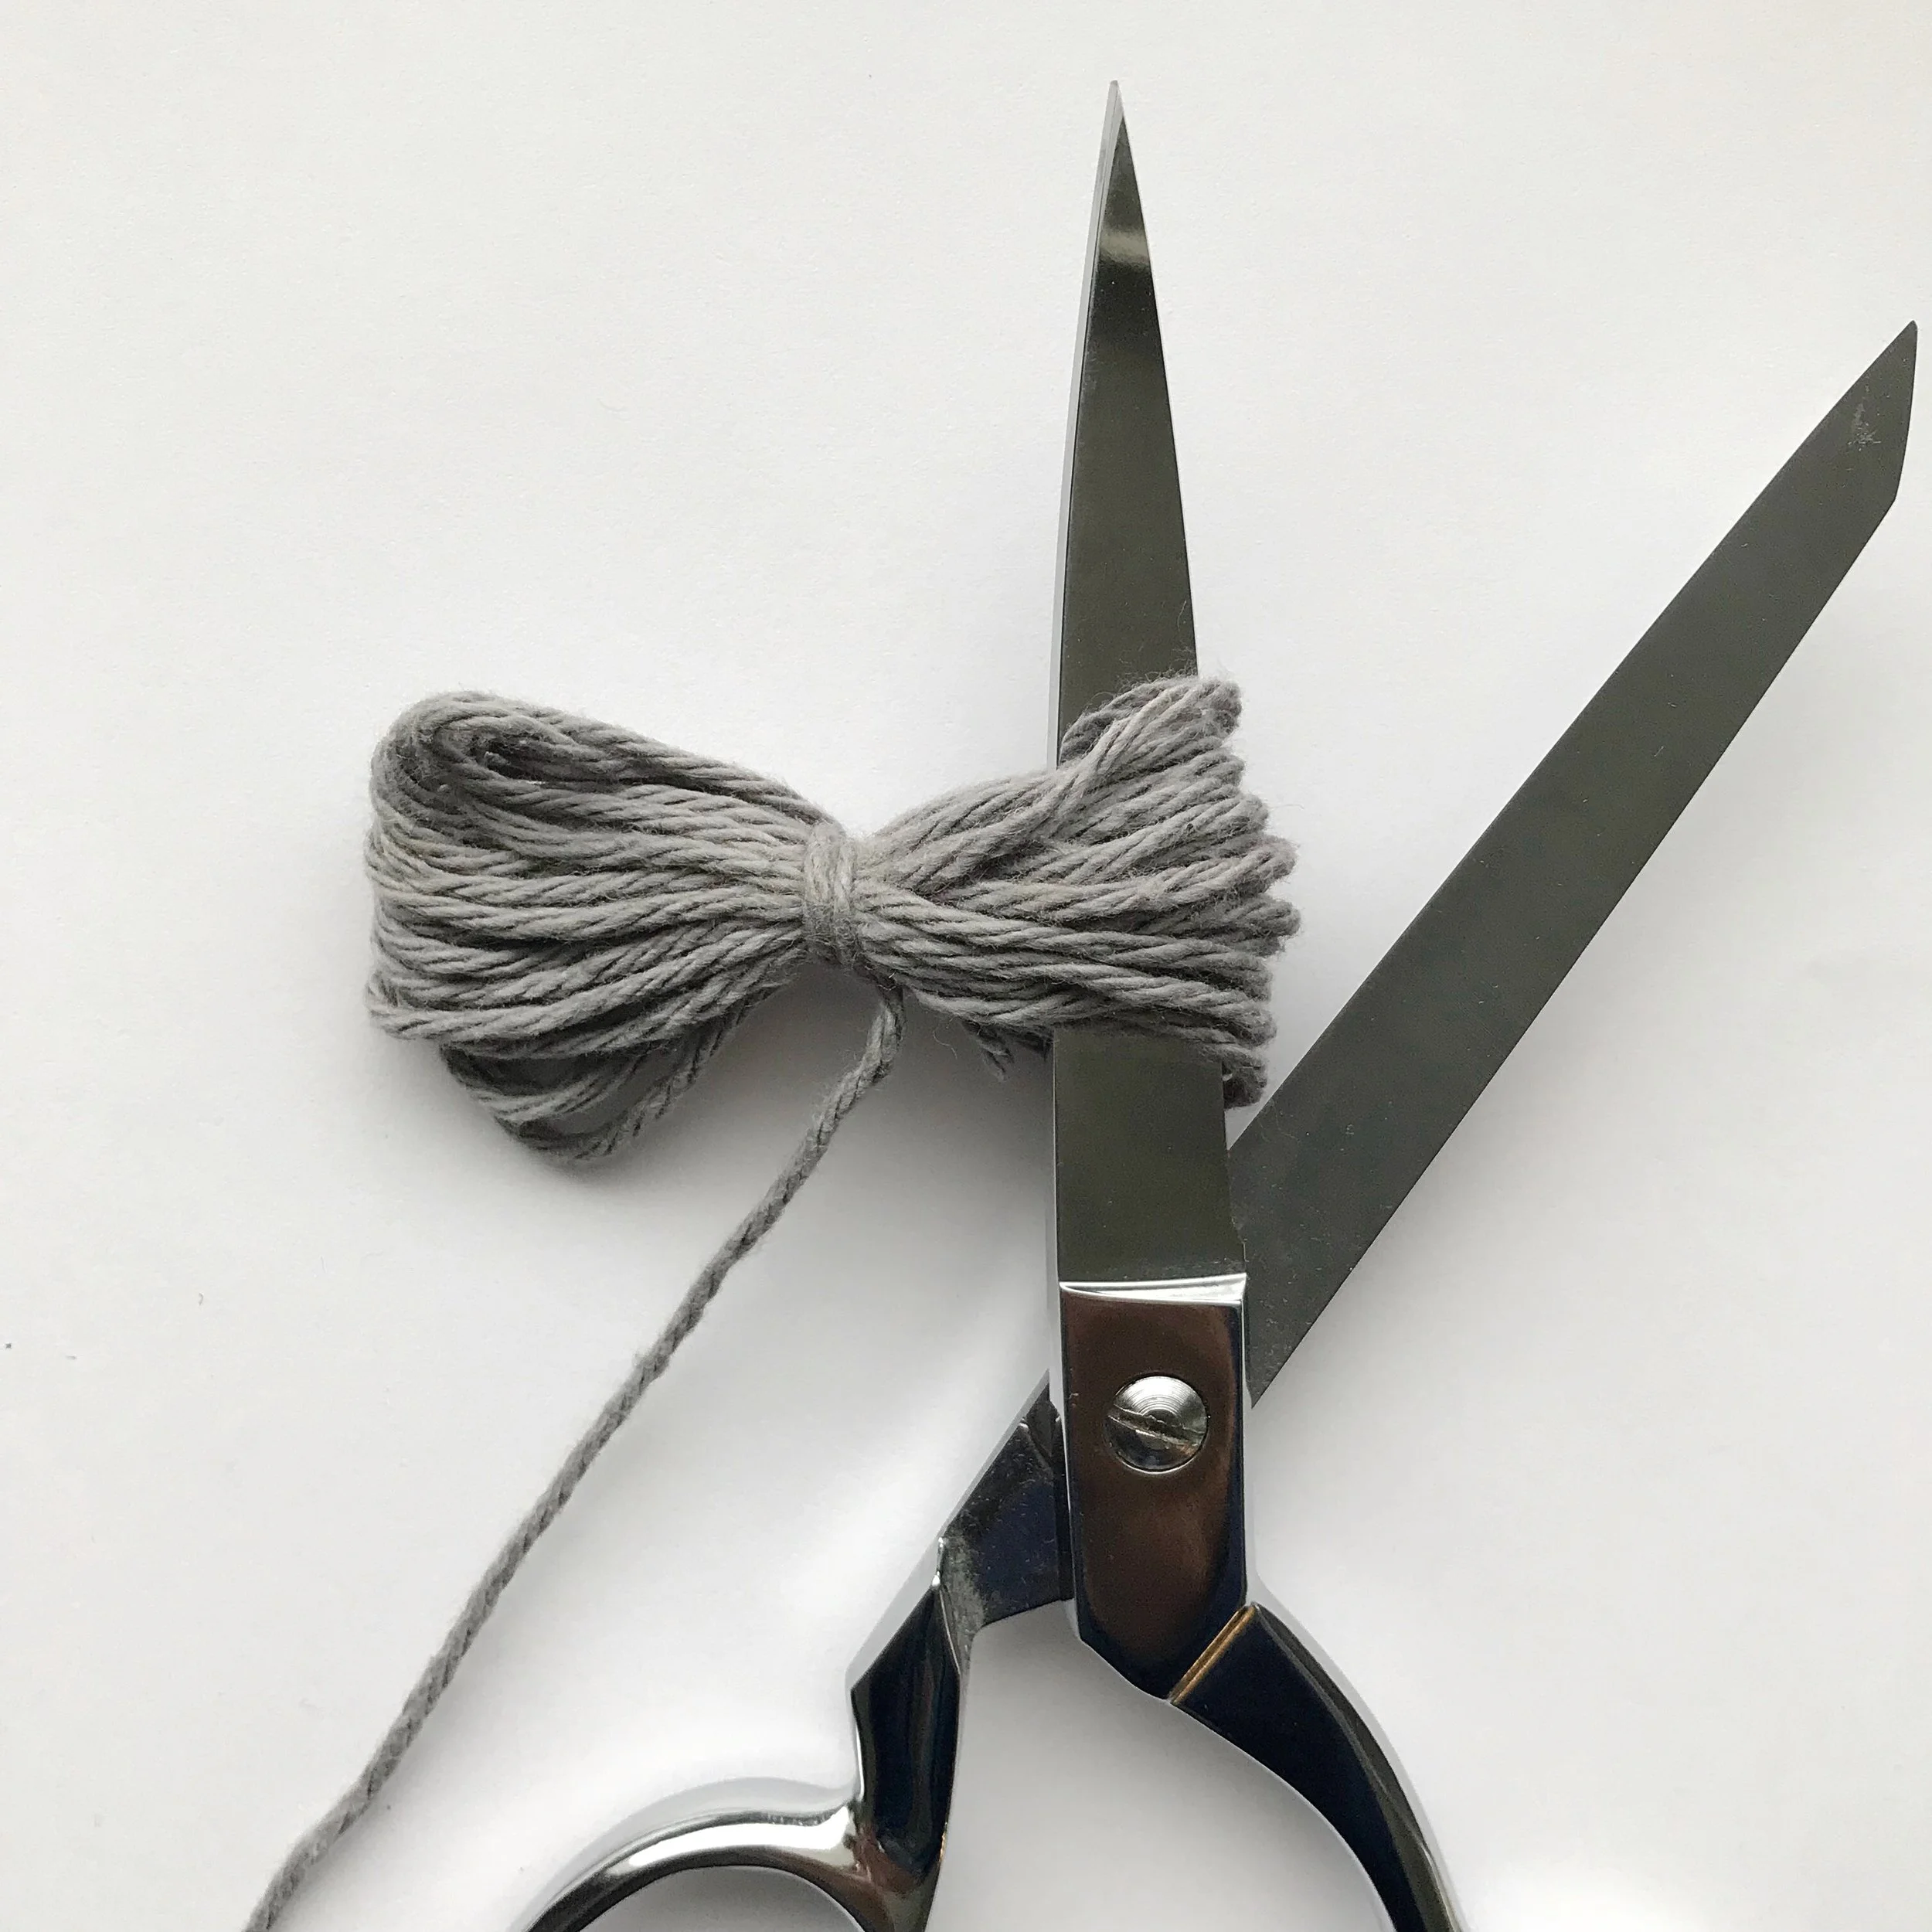
Pull tightly being careful not to break yarn (photo #4). Repeat from * three times. Your yarn will look like a bow. (photo #5) Make sure your “bow” is even on each side. Trim loops on both sides of your “bow”. (photo #6)
Trim pom pom (fluff as you go and be careful not to cut yarn tail) until pom pom looks uniform all around.
Attaching pom pom
If using a pom pom maker:
You will have 2 yarn tails. Working from the top, with pom pom on right side of beanie insert one yarn tail on one side of gathering hole and the other yarn tail on the opposite side. Turn beanie inside out and tie the two yarn tails together in a knot tightly. (Make sure your pom pom is firmly in place before tying the knot)
If you are NOT using a pom pom maker:
You will have 1 yarn tail. Working from the top, with pom pom on right side of beanie, thread the pom pom yarn tail through the gathering hole to the wrong side with tapestry needle. Turn beanie inside out and weave the pom pom yarn tail through two or three stitches in gathering around hole. Tie in a knot tightly.
Weave in ends. Turn right side out.
Congrats on your new beanie!